Thomas' T100 Adventure
Thomas Krieg is a physician at the medical school in Greifswald Germany. Thomas wanted to pursue a career in medical research and that brought him to Mobile Alabama to work in my laboratory for 2 years. Thomas likes motorcycles and he likes antique cars (he has a 1970 Volvo P1800 in Germany). When he saw my Bonneville he was hooked. He wanted to get a Triumph but still living on student wages his financial resources were very limited. We looked around for various projects until Jim Arrington announced the would sell us a pile of parts that he had been collecting to build a Triumph T100. The T100 is a 500 cc twin which shares many parts with its 650 cc big brothers. The T100 is a direct descendent of the famous Twenty One, a 350 cc twin that Triumph introduced in 1957. This was Triumph's first attempt at a unit construction engine. It is not truly a "unit" by today's standards because there are three separate oil compartments: the engine, the primary chain case and the transmission. Nevertheless this was the vision of Triumph's future. The engine was increased in capacity to 500 cc in 1958 as the 5TA essentially using the same nacelle/bathtub chassis as the Twenty One. In 1959 Triumph put the engine in a more sporty chassis and called it the T100A. The bigger displacement 500 cc engine was a fine package that continued in production up through 1973 with only minor refinements. During the 60's the AMA limited OHV engines to 500cc. That way America's only surviving racer, Harley's flat head 750cc K model, could still be competitive. As a result the T100 was Triumph's only choice for racing in the states and received much attention in that regard. The T100 engine was the pattern for Triumph's unit 650 engine introduced in 1963. This highly successful engine took the best of the 500 package and improved on the not-so-well-thought-out bits like the kick starter pawl (read on to find out more about the pawl). While T100s tore up the racetracks, the sweet little road version was kept in the model line as a cheaper alternative to the big 650's. At first glance the two bikes are indistinguishable. Both used the same18" rear/19" front rims, seats, instruments, Lucas electrics, oil tank and rear shocks. Closer inspection reveals a smaller cylinder/head assembly, slightly smaller diameter exhaust pipes, and handlebars mounted rigidly to the steering head. The tear drop tank although similar to the 650's is slightly shorter and will not interchange. In the 60's the wife/girlfriend was usually relegated to a lighter T100 while the male half drove a Bonneville. In the 70's the 650 package was extensively redesigned to the oil-in-the-frame models. The T100 sprouted a second carburetor to become the T100R but was otherwise unchanged. Thus if you wanted a more traditional looking Triumph there was always the T100R. The heart of our project was an incomplete 1968 rolling chassis with half an engine. Jim had rounded up a second parts engine, had the head rebuilt with new valves and guides, and had bought a pair of oriental 40-over pistons. In addition he had sent the frame out for sand blasting and even had it painted. He had assembled much of the frame and had it on its wheels when the deal was stuck. He sold Thomas the whole pile for $600 and we figured that we could finish the job for under $1000.
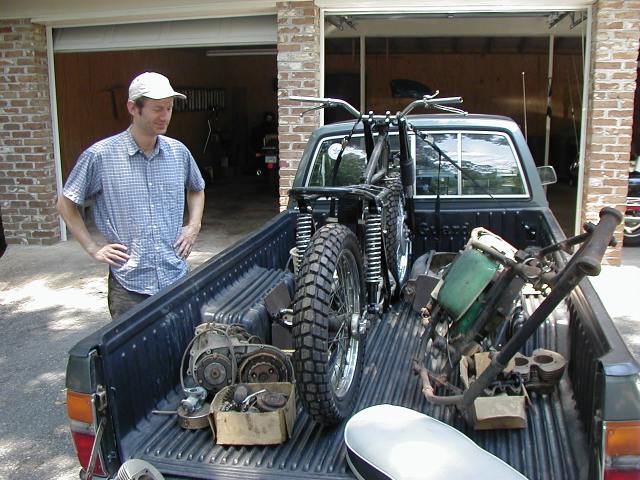
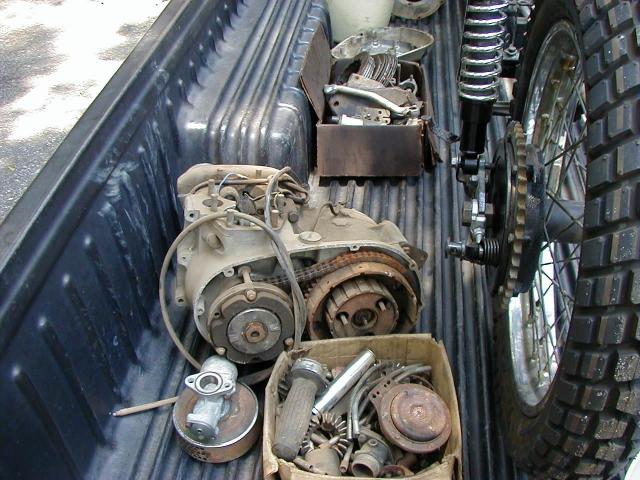
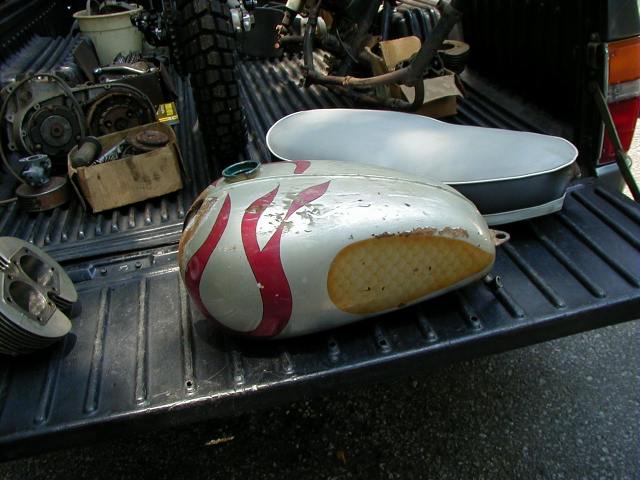
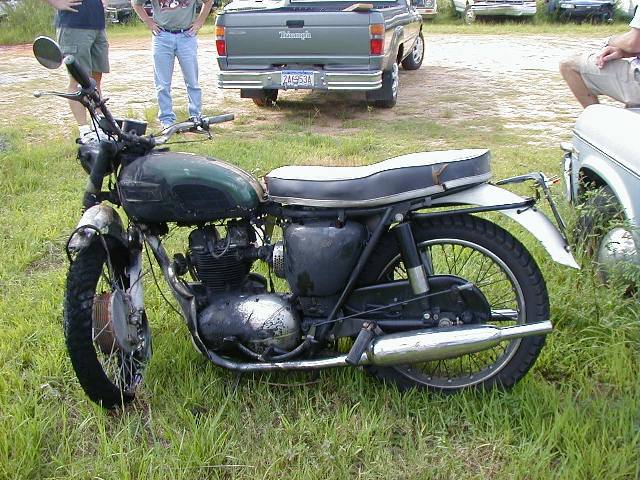
Thomas and I went to Jim's house to pick up the truck load of parts. As can be seen in the picture above we had all of the sheet metal, a nice seat which actually was the seat off of my 66 Bonneville but I had lent it to Jim for his 500 project. Although not correct, I just like the looks of the 1968 seat on my Bonneville better. Notice that there are remnants of two engines which looked like enough to make one good engine. Although the sheet metal was all there it was not pretty. Get a load of the custom tank complete with flames and lots of Bondo and rust.
The first job was to go through the boxes of miscellaneous engine parts and try to pick out enough to make a complete engine. The boxes were a conglomerate of mostly 500 parts + a little bit of everything else. Amazingly we found a set of rocker boxes, head bolts, push rods, push rod tubes, tappets and a points plate. Secure that we had most of an engine we split the cases and removed the crank shaft. This year's 500 had a ball rearing on the drive side and a bushing on the timing side. The bushing was OK but the ball bearing was shot. We heated the cases and drove out the ball bearing. All cases went with Thomas to be degreased with Gunk and soapy water. He then turned to polishing the timing cover, the primary cover, the rocker boxes and the transmission cover. Polishing aluminum is not difficult but it does require significant elbow grease. The trick is to water-sand all parts with 400 paper until bright. The sanding removes the hard oxide coating. Unless the oxide is removed no amount of buffing will cut through it. Here is a polishing hint: first sand the parts with some Fast Orange hand cleaner rather than water. That really removes all grease and gets the parts clean so you can concentrate on the oxide. Then they can then be polished to a gloss with Tripoli compound on the buffing wheel. The buffing makes the parts look great but leaves a film of nasty gray dust all over your shop.
While Thomas polished I took the rods off the crank and opened the sludge trap in the timing side of the crank. The trap was about 3/4 full of what looked like caked mud. With the sludge trap clean this triumph had a new lease on life. Jim had found a cylinder that could be bored for the oriental pistons. The Engine originally came with British Hepolite pistons but at about $200 a pair it was just too much for Jim's budget so he settled for a set of these oriental pistons for under $100. Jim's first surprise was that the pistons were several thousandths of an inch different from each other. He bored each cylinder for a specific piston an set them up with 4 thousandths clearance as recommended in the instruction sheet. The cylinder that he bored was missing its tappet blocks. There was another cracked cylinder in the pile with tappet blocks so the next job was to move the blocks to the good cylinder.
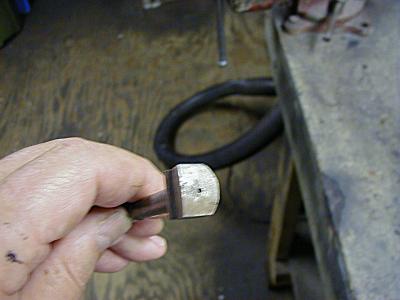
Have you have ever tried to remove a Triumph tappet block? It looks easy enough. Remove the locking screw and drive it out with a drift. The only problem is that when you try this you will invariably break one of the brittle guides that stick up on the block. That of course ruins the block. Triumph makes a tool that looks like two tappets welded on the end of a drift punch. The stems of the tappets slips in the holes and allows you to drive the block out without breaking anything. In the parts box were two extra 650 tappets which fit into the block. I ground the head of each tappet into a half moon such that when you placed them in the block they would fit through the hole as the block was driven out. I then applied a little heat from a torch and used a big drift on the heads of the two tappets. A few hits knocked them right out. I cleaned then up on the wire wheel, applied a new O ring and some gasket compound for good measure and drove them in the new cylinder again using the two modified tappets and a drift. It worked like a charm and the two modified tappets now have a permanent home in my tool box.
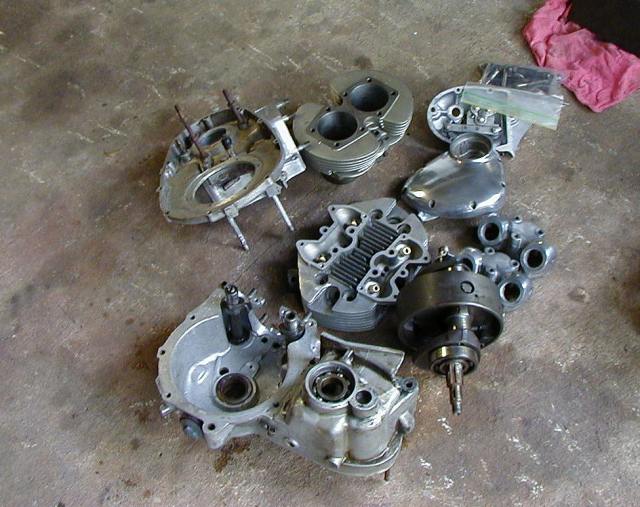
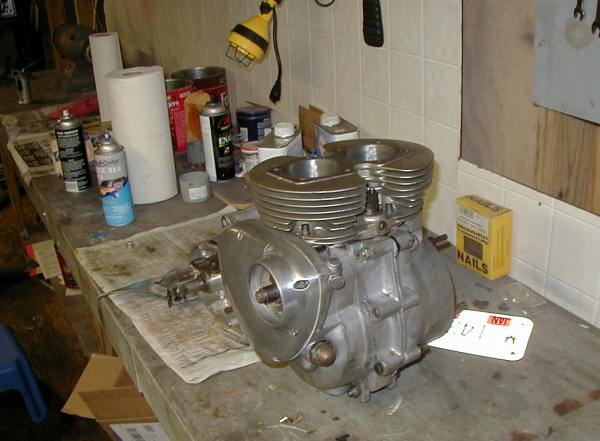
A trip to a local bearing store located all of the ball bearings that needed replacement. Jim had bought a gasket set and a seal set so things went together quickly. I put the crank and rods in the left case and using Honda Bond to seal the case halves bolted them together. The crank spun freely. Next came the cylinders and pistons. Here are three good Triumph service tips. (1 put a shop towel under the pistons so you do not accidentally drop a circlip inside the crank case. (2 Two standard hose clamps makes a good ring compressor system and will cover all three rings. Tighten them up just enough so that they will slip down the pistons as the cylinder is slid over them. (3 put the tappets in the blocks and wedge a piece of rubber tubing between them to keep them from dropping into the crankcase while trying to fit the cylinder over the pistons. Soon the bottom end was assembled and it was time to put the transmission together. You can see a picture of the engine at this stage.
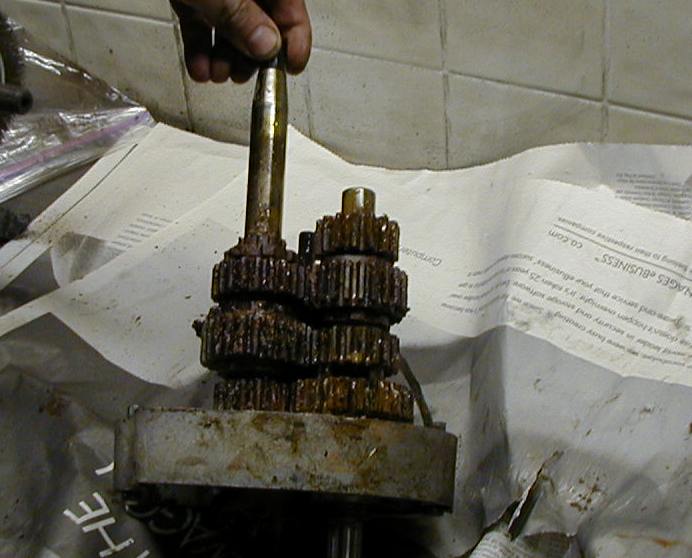
Jim had bought a donor engine from D&D Triumph in Pensacola that seemed to have a good transmission in it. When we opened it, however, we were in for a surprise. It was full of water. Check out the gooey mess in the picture. Amazingly the shafts and bushings were ok but several gears had bad rust pits where they had been under water. Thomas and I drove to D&D where Dink let us rummage through his transmission box. Now anybody who ever looked at a triumph would say they all look alike. The fact is that Triumph probably never built two bikes alike. Luckily Dink races 500's on the vintage circuit so he has lots of used 500 parts. It is amazing how many transmission ratios the made for the 500 tranny. Finally after much digging we found a good first gear with the correct number of teeth. Also, there were some critical spacers missing from the donor transmission. Dink had one of them in stock and I had to make the other out of a thin washer and lots of filing. Soon however we had a good transmission and the end play was within spec.
The kick starter on the 500 is quite different from that on the 650. In the 500 a spring loaded pawl on the end of the starter shaft engages notches on the inside of the first gear. The pawl looked a little rough but the spring was free and it seemed ok. We put the transmission together with the inner and outer cover. At this point the engine went into the frame. Amazingly all of the mounting plates could be located and soon it was secure. We then turned our attention to the clutch and primary side. After digging through box after box of parts we finally located all of the clutch parts. And soon had the primary side buttoned up. The head went on without a hitch. We next timed the cams. The instructions in the service manual did not match the marks on our cams. When we matched them as shown in the book the cam timing was no where near what is should have been. Simply lining dots with dots gave us what appeared to be a sensible cam action i.e. the intake opened when the piston was going down and the exhaust opened as the piston was going up. We buttoned up the timing side, put the rocker boxes on and finished the engine.
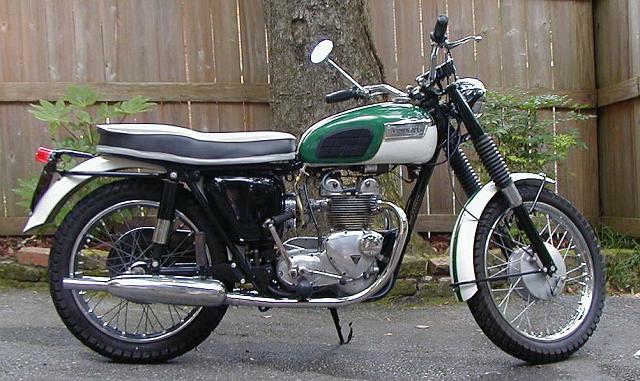
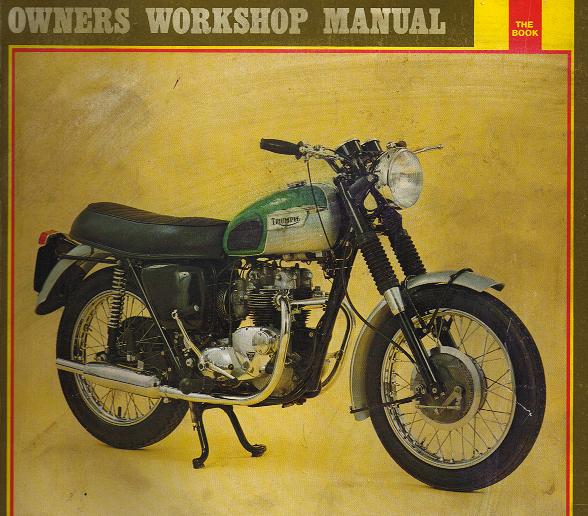
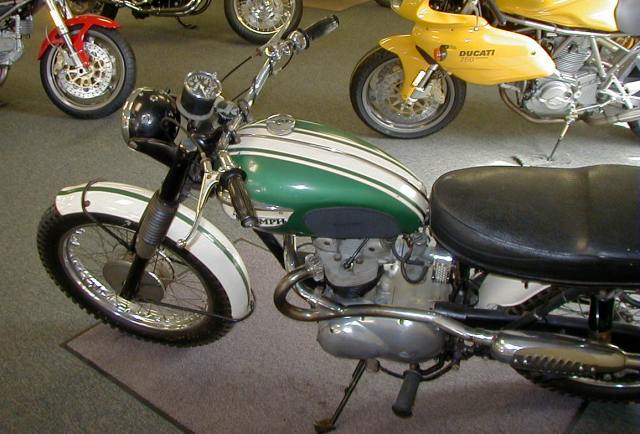
The next stage was the sheet metal. A trip to my friend's bead blaster soon had all of the parts in gleaming bare metal. I am sorry I don't have a picture of the painting but imagine me with spray gun in hand painting a fender. Great, you have got the picture. There was some debate over the colors. After many sleepless nights Thomas decided on metallic green and white. The inspiration was the 1968 model pictured on the cover of the Haynes workshop manual. The correct colors actually would have been green and silver but Thomas wanted the white because Dink has a beautiful all original 1966 T100 dirt bike on the showroom floor at D&D and it looked great in green and white. So we used 1966 colors with a 1968 trim scheme. We used base coat-clear coat with the white first, the green next and gold pin stripe tape between the green an white. Three coats of clear sealed the deal. The oil tank, tail light bracket, side cover and miscellaneous frame parts received gloss black acrylic enamel.
The rear shocks were the original Girling units with exposed chrome springs. The older parts bike had good shocks with the covered springs and the lower covers still had decent chrome. We painted the top covers and the shocks and they came out great. Although the covered shocks were discontinued in 67, the older-style shocks gave the bike a great retro look and matched the 1966 seat.
The 68 was an SAE bike using good old American pitch nuts and bolts. 1966 was the last of the Whitworth machines. Actually most of the engine bolts were still Whitworth right to the end of Triumph's days and it was only the chassis hardware that was SAE. We bought a bag of assorted nuts and bolts at a local hardware and proceeded with the final assembly.
Jim had located a set of aftermarket high pipes for the bike. His original intention was to build a dirt Bike like Dink's 66 and he had even installed a set of knobby tires on it. The high pipes would finish the job. Thomas did not think much of the high pipes. They were meant be sans muffler as they snaked through the frame at odd angles and barely missed the rear shocks. Nevertheless that was all we had so high pipes it was to be. Final wiring and assembly behind us it was time to see if it would run.
Amazingly the bike fired right up on the first kick. A quick look in the oil tank confirmed brisk oil circulation. Here is another Triumph service tip. On a new start like this, place your finger over the oil return hole in the oil tank. This forces some extra oil up to the top end to get it lubricating. We final adjusted the timing with a timing light and it was time for a road test. The next few lines are not pretty. Get the picture this thing is bellowing like a Harley chopper through the straight pipes. We took a few turns around the block and all seemed ok. I hopped on my Valkyrie and told Thomas to follow while we put some easy miles on it. Soon I saw Thomas fall behind and stop. I turned around and asked what was wrong. It just stopped he said. I got on and it started right up. I took it down the road and no sooner had I got up to about 40 mph the engine tightened up and ground to a stop. The el cheapo pistons were seizing! They were too tight. I rode the bike about 10 miles but every time I sped up it would tighten up. It was not going to wear in on its own, the engine had to come apart.
I took the cylinder and pistons to Jim at A&B Honda where he works. He measured the pistons and discovered the problem. The pistons were absolutely square. Let me explain. As the piston heats up it expands. Furthermore the top of the piston runs much hotter than the skirt. The piston should be made with a few thousandths of an inch taper from top to bottom such that when running it becomes a good fit to the cylinder its whole length. The oriental pistons had scuff marks on the skirt just below the rings where the upper parts of the piston had expanded into the cylinder. I suggested that we hone an additional 2 thousandths out of each cylinder. Jim cautioned that that would make the skirts too loose and that they would rattle. At this point Thomas was low on cash and we decided to try the junk pistons anyway. Jim was right of course. On reassembly the loose pistons rattled like a threshing machine however it didn't seize anymore. We rode the bike for about 20 miles and it ran great although noisy. While annoying, piston slap is a relatively benign noise and until we can find a good cylinder, Thomas is happy to put up with it. In retrospect I should have used a little emery cloth to take the 2 thou off the upper portion of the piston in my lathe rather than honing the cylinders.
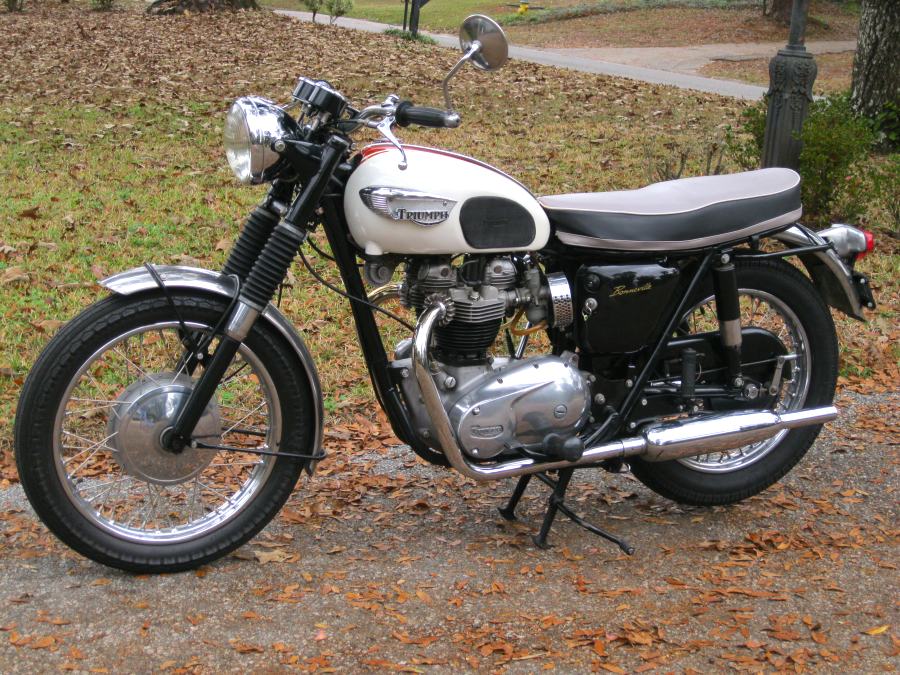
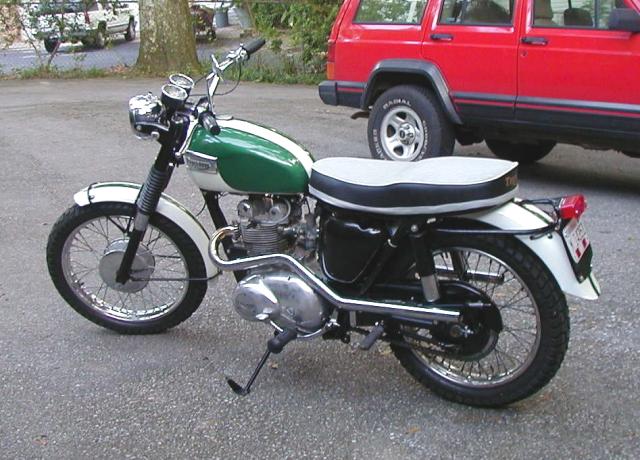
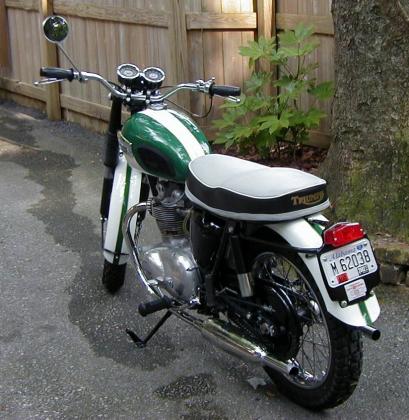
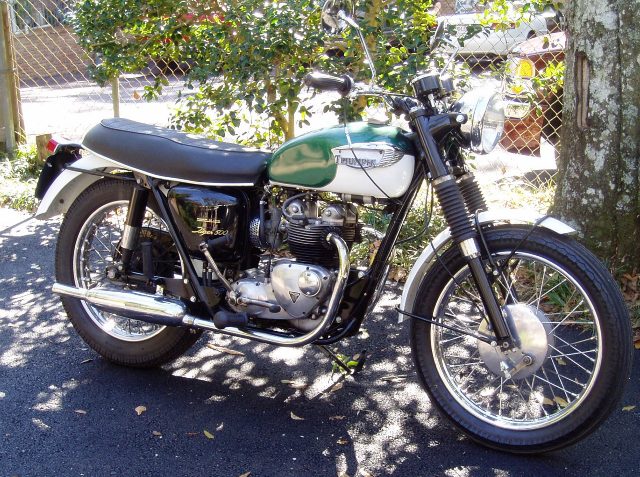
While I was struggling with the pistons Thomas located a set of new exhaust pipes. We had bought a set of used but not bad mufflers from D&D so we had a complete set of low pipes. Now the bike sounded civilized and looked pretty much like the picture in the book! After our ride I went to start it again and the kick starter pawl failed. The starter peddle would not engage the engine. Remember back in the beginning when I said it looked questionable? Well, it was. If nothing else we are persistent. To replace the pawl you have to not only remove the transmission but that also requires disassembly of the clutch and primary drive. I had another pawl in the parts box so apart the transmission came. One good thing about a Triumph is that the transmission can come out without splitting the case halves. This is about a 3 hour job from start to finish. To make maters worse we ruined the gasket on the primary cover. We used silicone seal but our first attempt leaked so it had to be sealed a second time. Now the bike was truly finished and it was time for Thomas to take it home.
Click here to see the other side.
Footnote: Thomas rode the bike to work on a daily basis for about a year. Then in August of 2002 a car made an illegal left turn in fornt of him badly breaking his leg. The bike caught fire after the crash and was badly damaged. After a year of negotiation through a lawyer Thomas finally received a settlement from the car driver's deadbeat insurance company (Met Life) who tried desperately to dodge any payment for his injuries. Thomas did recover fully after his surgery and was able to finish the New York Marathon the following year. I put the bike back together and it came out ok. Thomas refused to ride it again and I never felt the same about it so I eventually sold it.