We Are Making Progress
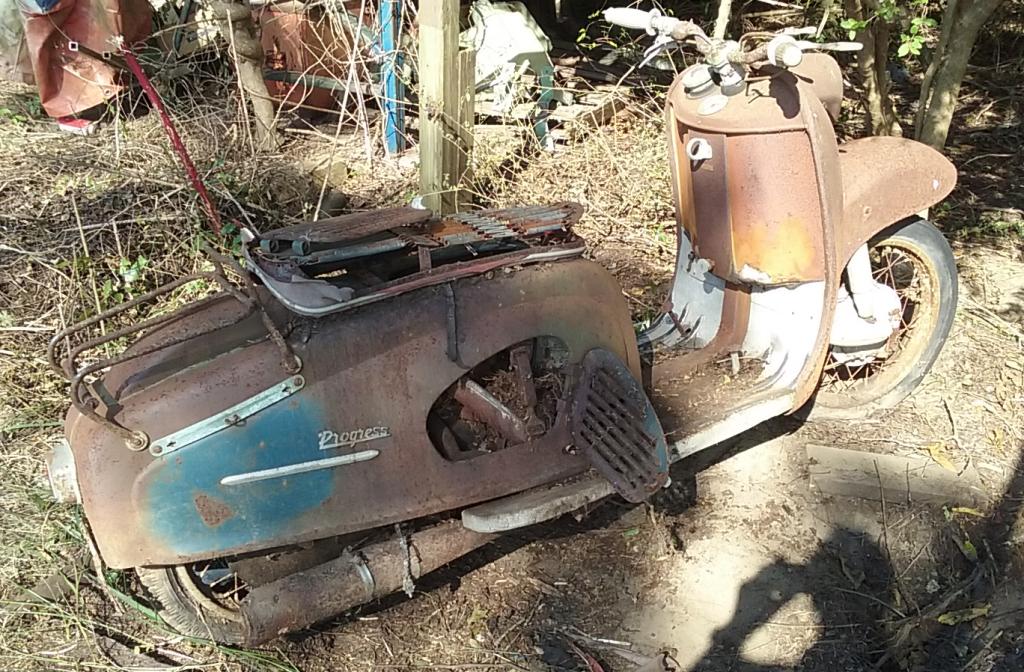
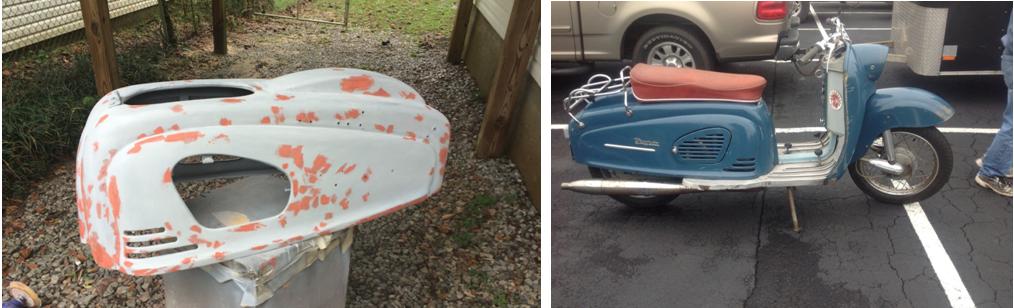
Word was that an elderly gentleman in Grand Bay Alabama had passed and he had a number of old motorcycles scattered about in the woods behind his house. His widow was trying to sell them. I saw some pictures one of the club members took and they looked like mostly small European dirt bikes. Several months later a friend said he was going out there and wanted to know if I wanted to join him. Behind his house was a storage shelter with a lot of junk under it including some Japanese scooter hulks. All the motorcycles had been bought except for one very unusual scooter. It was rusty and dirty but the more I looked at it the more I liked it. Also, all of the sheet metal seemed to be there including the louvered side doors and even the seat frame and trim were there. The kick starter had sheared off its shaft, probably by people trying to unstuck a frozen motor. The remnants of the ID plate indicated it was a 1958 Sachs Progress scooter. I had never heard of it but I offered $45 which was quickly accepted. Probably $4.50 would have gotten the same response from the widow who seemed more interested in seeing this piece of junk gone from her back yard than deal in high finance in the rare antique market.
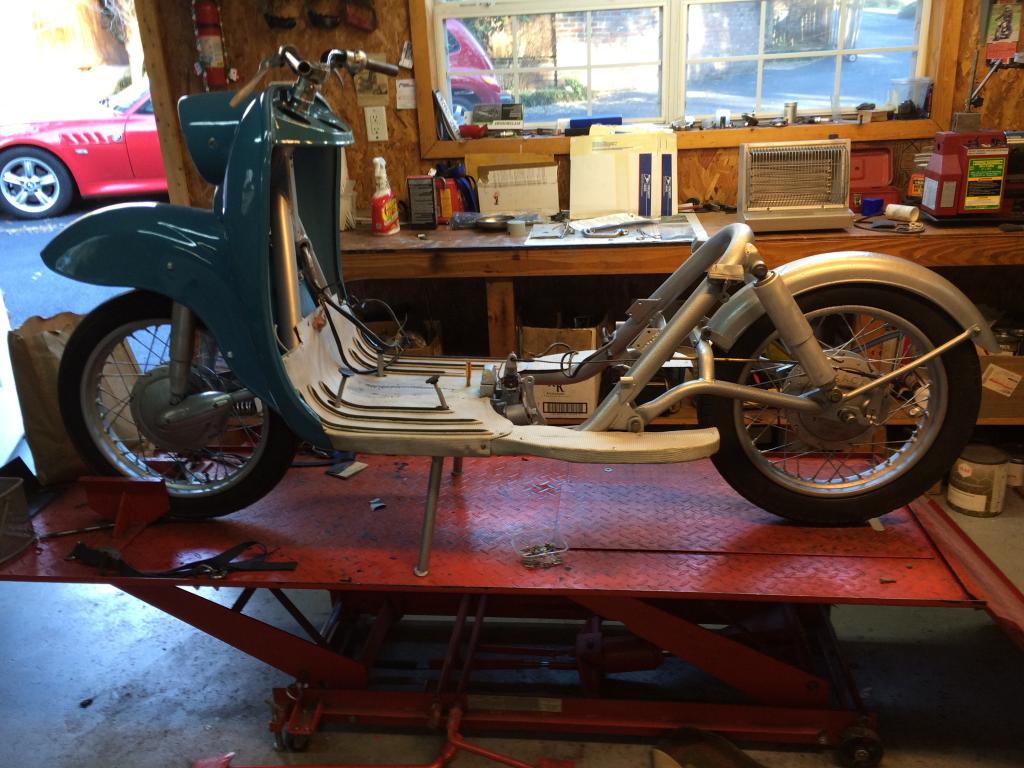
There was a tarp on the ground next to it that I suspect once lived on top of it until some prospective buyer took it off to see what was under it and didn’t bother to put it back. More about that later. Both tires were beyond flat they had totally deteriorated and of course neither wheel would roll. Three of us pushed, pulled and grunted getting it the 20 odd feet to a waiting trailer. A stop at a car wash got the first layer of crud off of it. As you can see in the above picture a community of varmints had been homesteading in the engine room. Copious volumes of pine straw, rat shit, and bits of paper gushed out. Once at home it was time to start disassembling and taking stock of what I had and, more importantly, what I didn’t have. Bit by bit it came apart. It was actually more like an archeologist removing layer upon layer of dirt from a historical site. But I could see past the dirt. The sheet metal was amazingly solid and free of dents. The aluminum trim which would be impossible to replace would actually polish up. The wheels were locked up from rusty brake drums but were easily made to roll again once the remnants of the tires were cut off the rims. There was indeed hope. For some reason the engine must have seized. After breaking off the starter pedal the owner simply pushed the dead scooter aside and directed his attention to another bike in his collection rather than take it apart to see what was wrong. That was actually a good thing because the scooter was all together and there were no missing parts as is so often the case with a basket case.
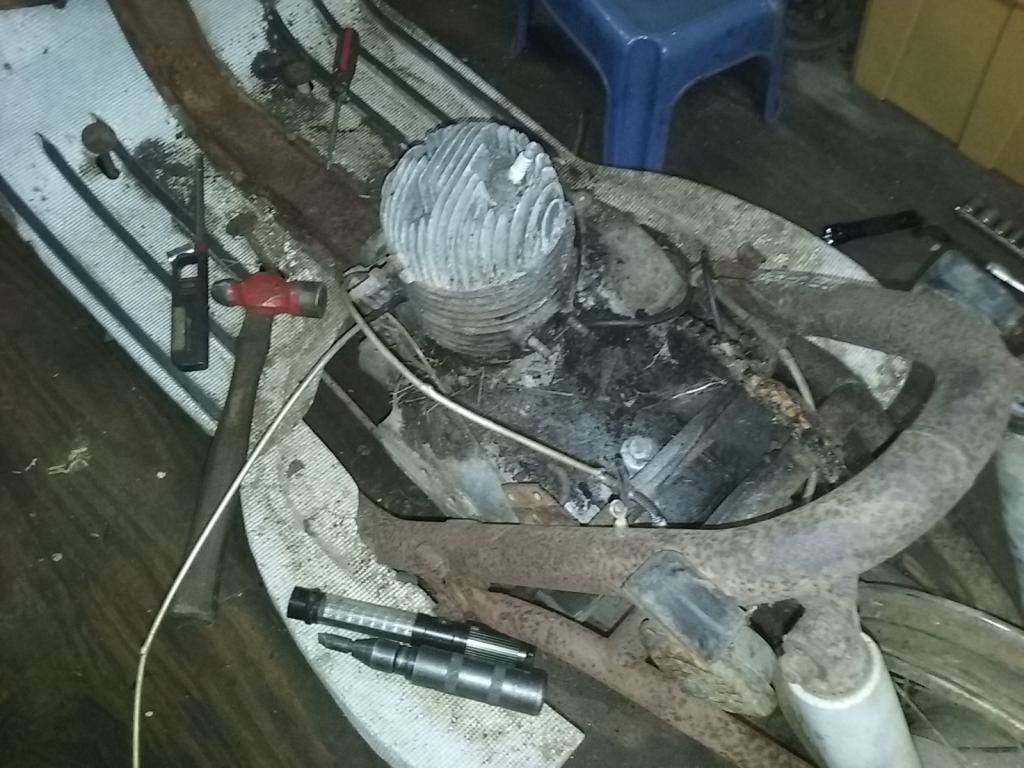
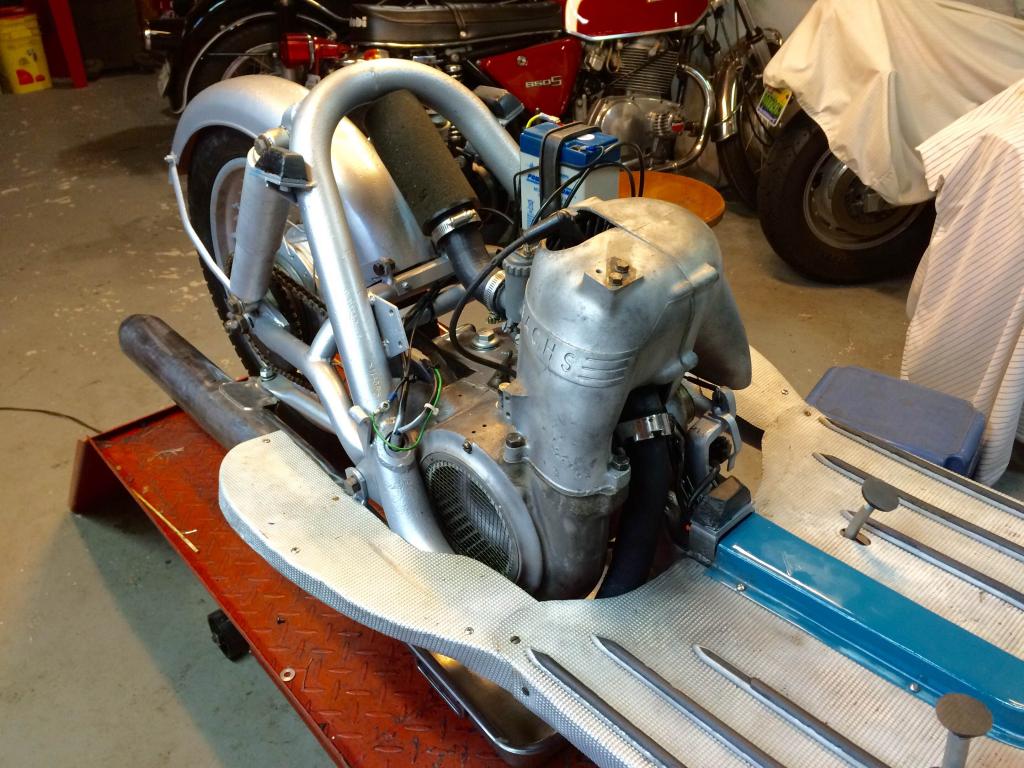
The rear body work is held on by just two suitcase style clamps (one is visible inside the side door in the first photo). Loosening the clamps allowed the body to be lifted off the frame. Underneath was a 200cc two-cycle motorcycle motor. It had a fan on the flywheel which blew air through a cast aluminum shroud over the cylinder to cool it. It had a very rusty air box which opened upwards under the seat. Unfortunately the air box was filled with water. Remember the trap that was next to the scooter rather than on it? The Bing carburetor and the crankcase were full of muddy water. The picture above shows the motor with the shroud and carburetor removed. It looked like the water had not been there long as corrosion in the carb and engine were actually minor. The internet revealed that the progress scooter was made by Sachs for only several years. The motor was the same as used by the Messerschmitt KR200 3-wheeled micro car. That gave me hope that motor parts might still be around as the cars are quite collectable. Except for the cooling shroud the engine is pure motorcycle with a 4-speed foot shift and handlebar clutch. The big 16-inch spoke wheels took regular motorcycle tires and made the bike more motorcycle than scooter. It had a conventional swing arm rear suspension and an earl’s fork up front. A heavy tubular steel frame finished the job and the frame looked like a cross between a motorcycle and a German panzer. Except for the motor everything including the checker-patterned aluminum floor boards looked like they could be saved. The motor, however, was a different story. The picture below shows the motor was filled with a nasty mix of dirty water and transmission oil. The piston was hopelessly stuck in the cylinder and had to come out in pieces. The rod bearing had eaten its race and the bearing surface on the crank pin looked like a plowed field. This was a real problem. Even if I fixed the crank and bought a new piston, the transmission and bearings looked rough and impossible to find. Also, there was the issue of the sheared off kick starter shaft as can be seen in the picture below. The first thing that came to mind was a motor transplant. A nice 4-cycle 250cc motor would work nicely but I didn’t know how I would cool it without a shroud and a fan. I could get an industrial motor with a cooling shroud but then what about the transmission? A modern scooter motor would not work as they are geared for small wheels which bolt directly to the motor and I wanted to keep my big motorcycle wheels.
I mentioned my quandary to Mike Porter at Powdercoat Junction and he said he had a friend in Birmingham who has Messerschmitts. Maybe he might know where I could find parts. It turned out that he had an almost complete parts motor from a
Progress scooter that he would like to sell. The car motor was slightly different in that it had a
combination starter/generator under the flywheel where the scooter motor had just a magneto and alternator coils. That made the crankshafts non-interchangeable. He robbed the cylinder and shroud from the scooter motor
but he had no use for the bottom end. I drove to Birmingham and was surprised to see it had everything that was bad on my motor. It had a standard piston
with rings and smooth-turning bottom-end bearings. I had the standard cylinder, carburetor and head that would be needed to make it run so I bought it for $400.
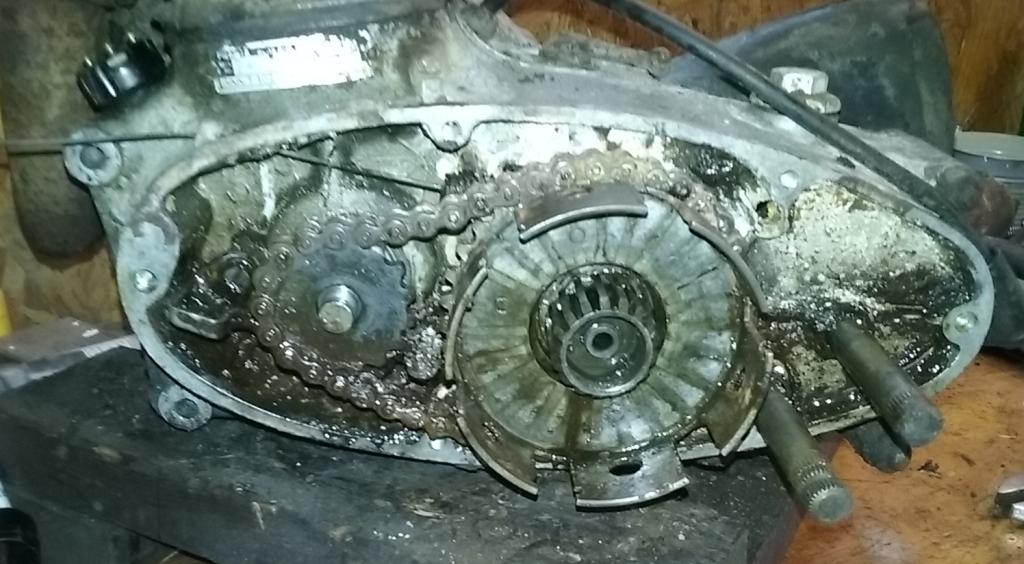
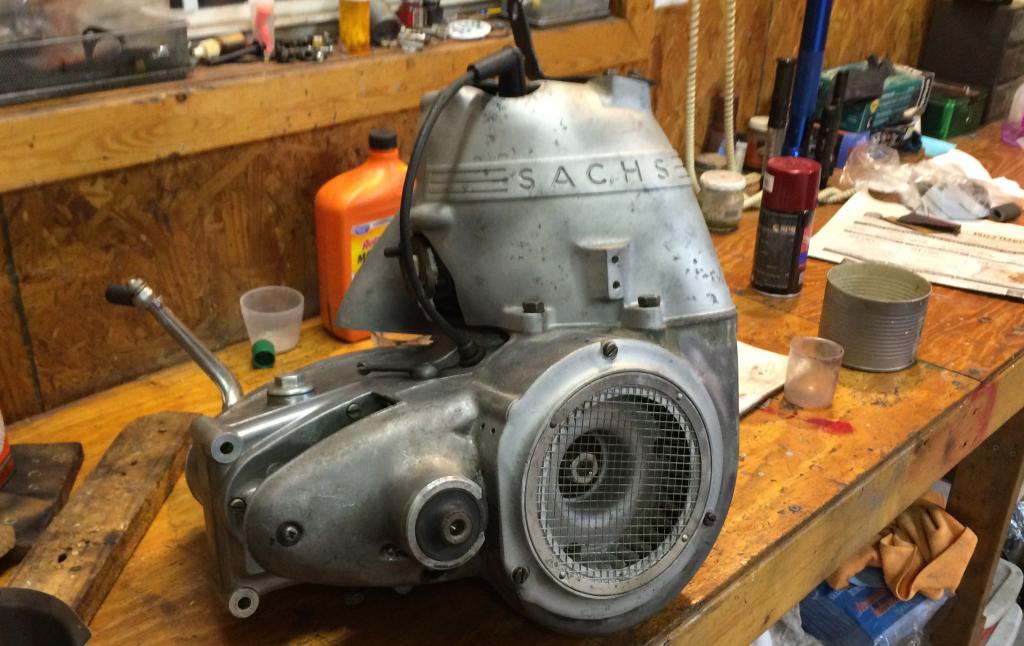
Below is a picture of the complete motor that I put together out of the two.
A major problem with 2-cycle motors is crankcase air leaks. If the crankshaft seals leak air they will not run worth a darn. The question was how good will these 50 year old seals be? The motor is extremely complex and I was not anxious to take it apart unless absolutely necessary. It uses 3-piece ball bearings with separate inner and outer races like those used in bicycles. The end play is supercritical for these type of bearings and is adjusted by many shim washers on the crankshaft and both transmission shafts. So I decided to just put it together and take a chance that it might actually run. The splines on the kick start were identical to those used by Honda for their small motors so Steve McClintock kindly welded the broken Sachs kick start lever to a hub sliced off a Honda lever. The rubber piece on the case just behind the cooling fan is the rubber motor mount vulcanized into the case cover. There is one on the opposite side as well. A third rubber mount attaches to the front of the motor (not shown).
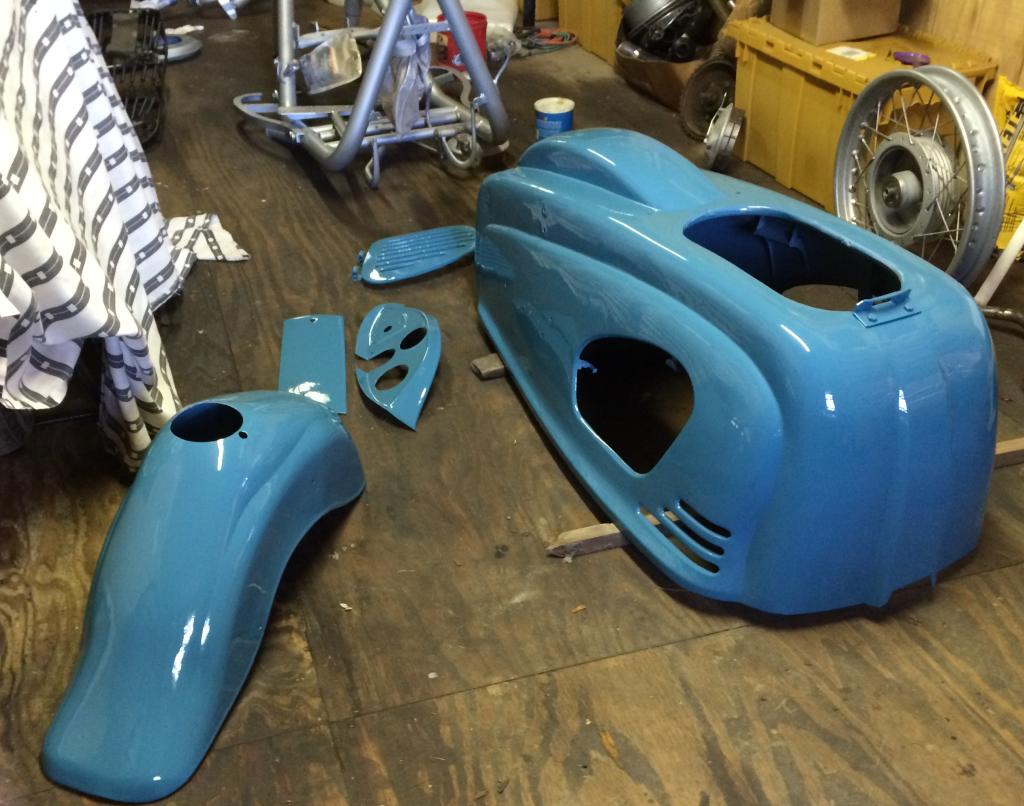
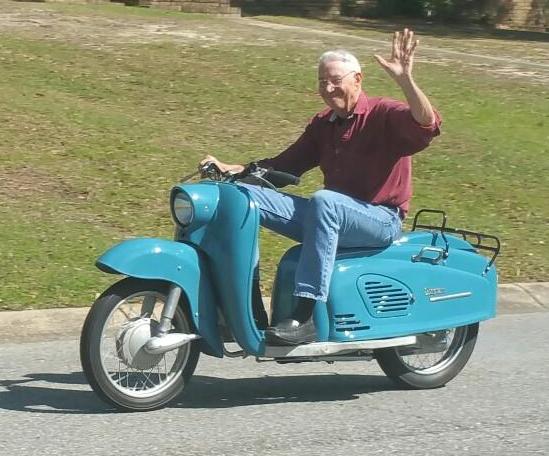
The frame and body parts were sent out to Phil Ostercamp in Grand Bay where all parts were media blasted to remove the rust and sprayed with epoxy primer. While the sheet metal was not dented it was full of rust pits. Those were carefully filled with glazing putty and were allowed a week of setting time to shrink before sanding. After several weeks of preparing the sheet metal it was time to paint it. I found a picture of a powder blue progress scooter on the internet (see below) and that was close to the remnant of paint that was left on mine. I looked at paint chips at the paint store until I found what looked like a good match. I bought a quart of base coat/clear coat paint and I was ready to go. With Pat Redding’s help I got it all painted. I painted the frame parts with a silver single-stage paint.
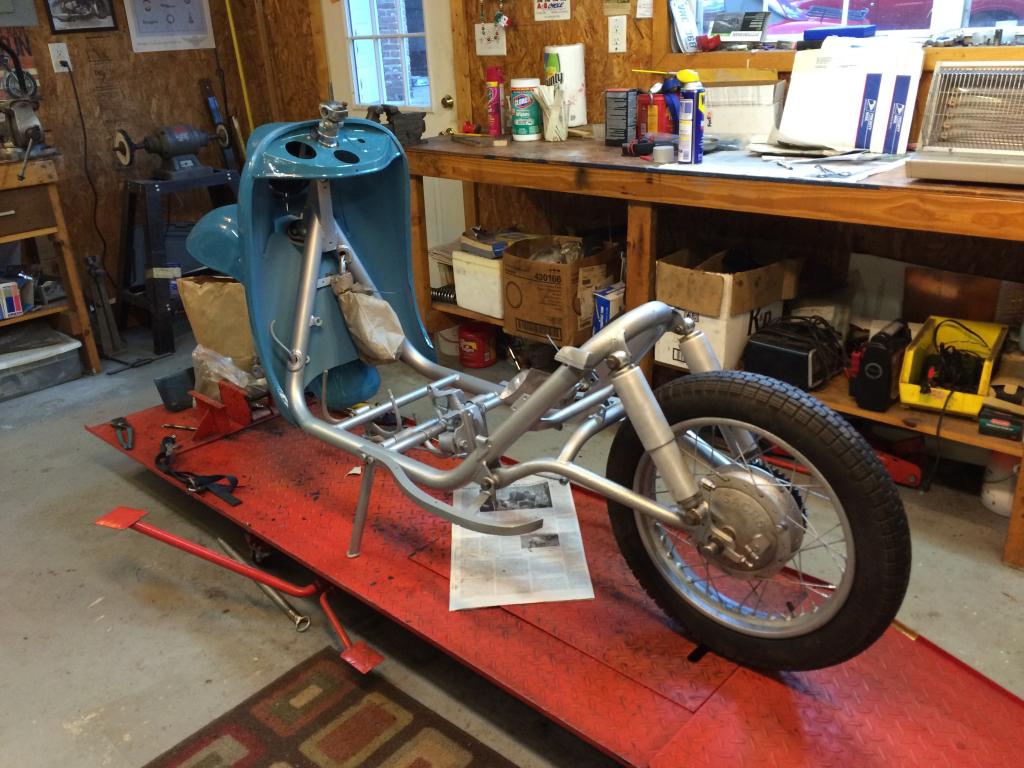
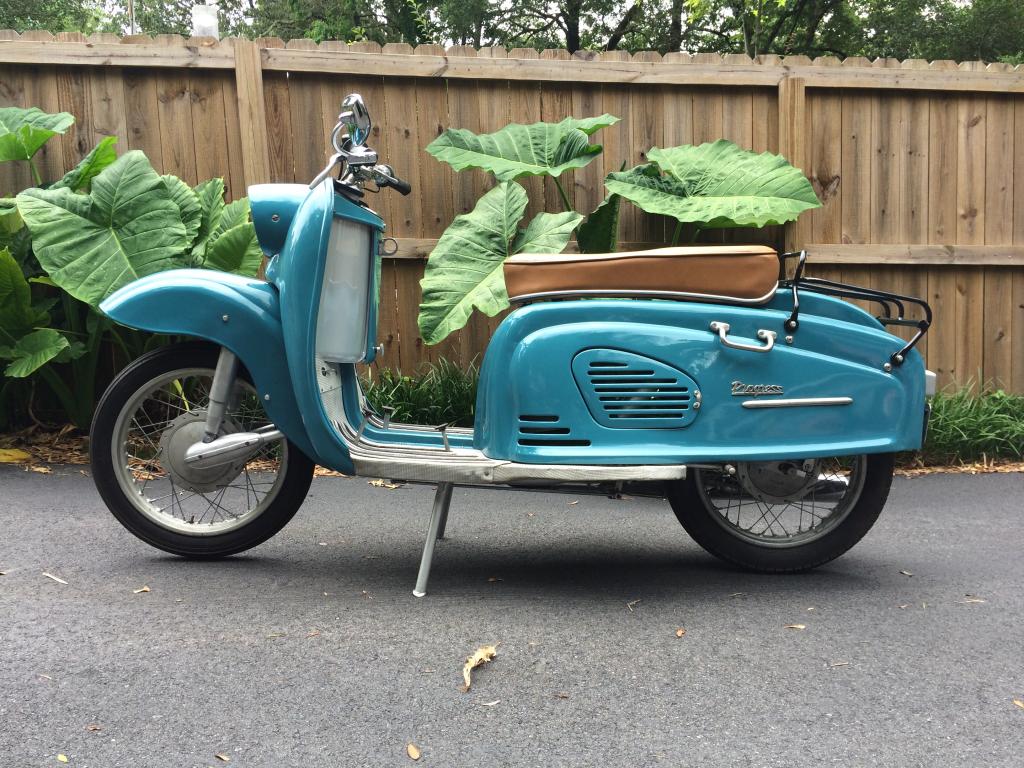
The finished paint job can be seen below. Note the silver frame in the background. The rims were completely devoid of chrome but they were surprisingly solid after bead blasting and priming. I decided to simply paint them silver for the moment and see if and how it ran before investing big $$$ in rims, spokes and tires. I had a set of usable 16” tires in the attic and decided to mount them for the initial testing. Finally, I could start putting things together.
The first step was to mount the front end and get it up on its wheels. All 4 shock absorbers were usable and cleaned right up. After cleaning the wheel bearings I was able to repack them with grease and I had wheels that would turn. The first piece that goes on is the splash shield. After that the front fork and then the front fender. There are 2 fuel tanks that mount inside the splash shield. The right tank was badly rusted and unusable. The left tank has the fuel fill that pokes through the dashboard. It was rusty inside but had no holes.
I have a variable speed Bodine geared motor mounted on a stand for cleaning tanks. A 30” plywood disk is mounted on the horizontal shaft exiting the motor. There are a half dozen hooks screwed into the plywood so I can put a box of drywall nails in a tank and bunji it to the board. I then start the motor at a rate that causes the nails to continuously scrape the inside of the tank as it turns.
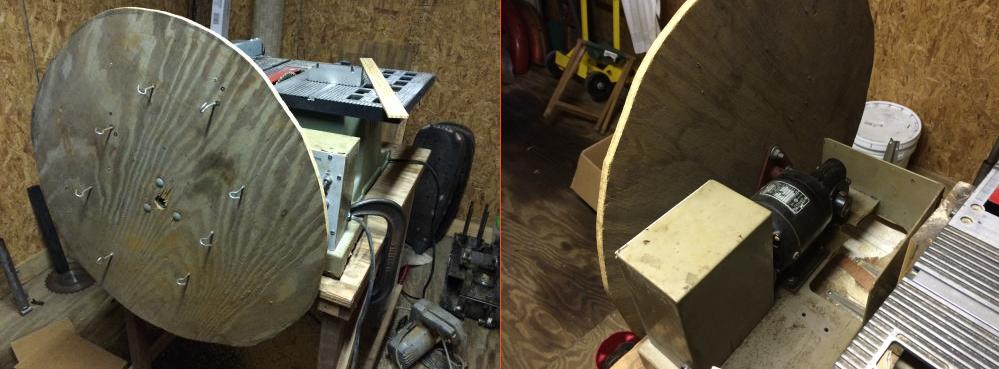
I had to rinse the tank out with paint thinner a few times to get rid of the rust residue that was accumulating in it. After 2 or 3 hours of that the inside was nice and shiny. I lined the tank with Red Coat gas tank liner to seal any pin holes that may have opened up and discourage any future rust. As per the picture off the internet I painted the tanks silver. Originally there is was a crossover that connected the two tanks. I simply closed off the crossover and now just use the left tank which holds a couple of gallons. I was also able to rebuild the petcock so I had a functional fuel system.
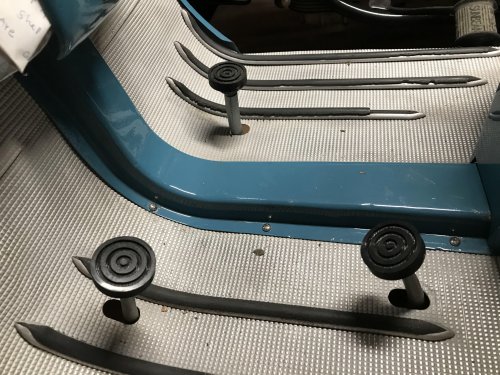
The aluminum floor boards were dirty but they cleaned right up in my blast cabinet. The rubber foot rest strips were also usable. Even the rear brake cable was no worse the wear. Unfortunately, the rubber covers on the round pedals were shot and I am looking for three round rubber covers. If anyone out there knows where I can find a suitable replacement let me know. The pedals are 35mm in diameter so the covers must slide over that. It was now time to consider the electrical system. There was a BMW-style phenolic circuit board behind the dash which made up the ignition/light switch. It took a "nail" type key and was almost identical to that used by the BMW R25. The key was rusted into the switch’s plastic cylinder. I was able to loosen it with penetrating oil but I could not slide it out. Finally a good pull got the key out as the cylinder split in half. I was able to clean the rusty innards and had it looking pretty good but how could I repair this plastic cylinder? I happen to have a big spool of nylon thread in the shop. I mixed up some epoxy glue and smeared some glue on the broken surfaces and held the two halves together as I wrapped the spool with about 100 turns of the nylon thread maintaining tension as I wound it. I secured the ends and then smeared epoxy on the thread wrap. So-far the switch has been trouble free.
There are 3 coils under the flywheel. The first supplies ignition current to the magneto. A wire goes from it to the ignition switch to kill the motor by grounding the points wire. The second supplies current for the 6V headlight and tail light. The lights are direct and go dim at a stop light. The third coil supplies a little current to charge the 6V battery through a diode. The battery supplies the brake light and the horn. Several wires had been disconnected from the circuit board but it was not difficult to figure where they went. I was able to reuse most of the wires which still had soft plastic insulation on them. The Hella tail light was intact but the glass lens was broken. I looked everywhere for a replacement but could find nothing. Then one day at Auto Zone I saw a pack of red plastic rectangular stick-on reflectors for a couple of dollars. I took a chance and bought them. They fit in the tail light perfectly without any trimming and that solved that. The handlebars were pretty rusty. True to German manufacturing practice the handlebars were 22mm which is slightly smaller than the 7/8 inch that all other countries use. The levers were in good shape and were made of cast zinc instead of aluminum or steel. They of course would not fit on a 7/8" bar of which I had plenty. Jim Arrington was restoring a BMW R25 and offered the still-decent bars he had replaced. They cleaned up and worked fine. The headlight was all there and only needed a little polishing on it's chrome rim. The horn/hi-lo switch on the handlebar was a little sticky but some WD-40 loosened it up and it works fine. A coat of flat black paint made it presentable.
Now it was time to mount the engine. The front motor mount can be seen in the above picture. It picks up 2 case bolts and mounts to the frame through a rubber piece. Above it is the brake linkage with a stop light switch and a cable going to the rear wheel. The rubber side mounts engaged the rear swing arm bolts. They all lined right up and like that the motor was in the frame. Steve McClintock brought over his stash of cable making stuff and that helped immensely as all of the control cables needed replacing. The throttle and choke cables were made from 10-speed bicycle cables. I used heavier stuff for the clutch and front brake. The cables and wires all run under the blue cover in the center of the floor boards. Note the 3 rubber pads on which the body rests (one in front of the engine and one near the top of each rear shock absorber). I had to fabricate an exhaust pipe from an old Yamaha R5 exhaust system I had in the attic. The muffler fit well and looks sort of like the original. The header pipe was welded up from pieces of the Yamaha header pipe. The muffler bolts to a bracket bolted onto the engine so it moves with the rubber-mounted engine. I used a "sock" air cleaner as the original air box was beyond repair. I ran a new fuel line through the frame tubes and connected the carb to the petcock. I put some 25 to1 two cycle gas in it, crossed my fingers and tried to crank it up. It actually started!!!
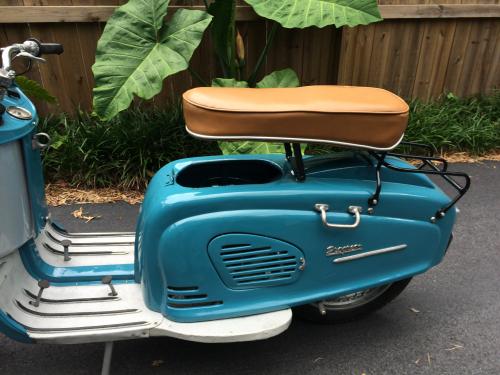
But, I could only keep the motor running by keeping the enrichening valve open. That was a problem. Maybe the air leak curse was on my motor after all. Before giving up I decided to have one more look at the carburetor. There are two jets in it with identical threads. One is the main jet with a big orifice and the other is the idle jet with a small orifice. It wasn’t clear which went where in this rather strange Bing carb so I decided to switch them and see if that might make a difference. It did. Now it ran quite well and I decided it was time for a test ride. It took me a while to figure which way first gear was. Many of these older bikes have first on top, while others have it on the bottom (it was down). When I finally found first gear I rode up the driveway and onto my street. All 4 gears were there and the brakes actually worked as did the lights and horn. Best of all the motor idled down nicely at the stop signs. The crank seals seemed ok. It was nothing short of a miracle. The picture below left shows my first test ride (with no seat). Now I was in the home stretch. I had to replace a few springs on the seat after it was blasted and painted and then it was ready for covering. I took it to an upholstery shop in Grand Bay and the owner made a nice seat cover for me for $50. I mounted it with an inch of foam over the springs. If you look closely at the first picture in this article you will see the original aluminum trim was still on the seat along with the Denfield badge. They both cleaned up nicely and I bolted them to the seat. The seat hinges and lifting the rear of the seat unlocks it and swings it out of the way for access to the motor as shown below.
 |
 |
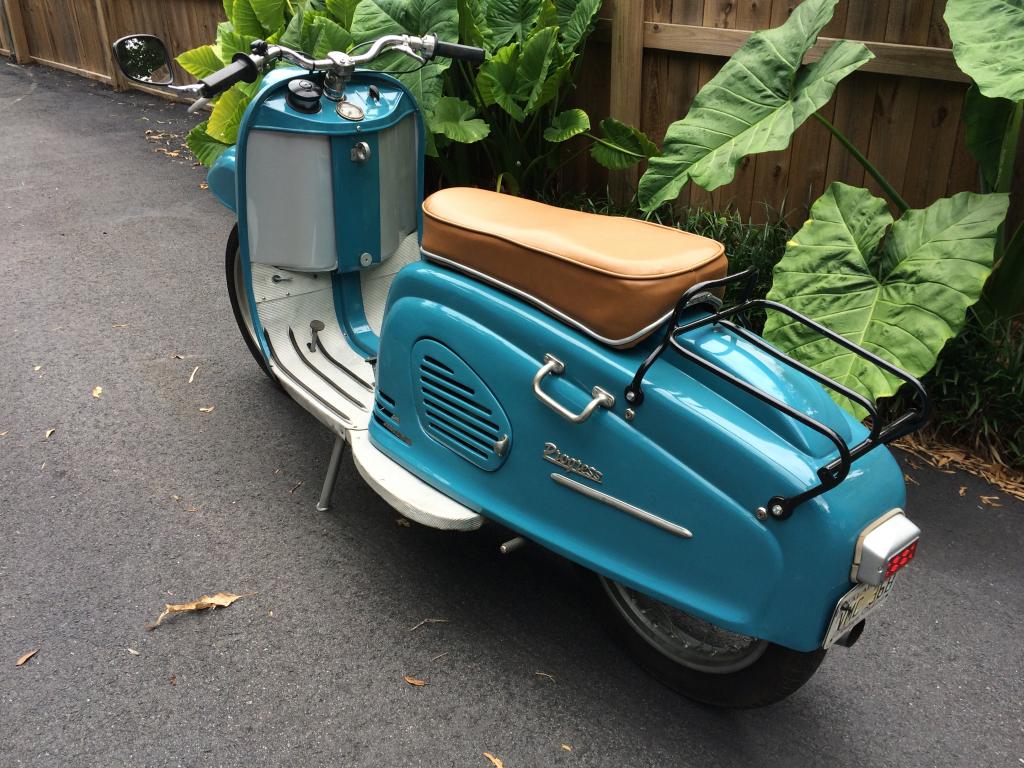
A handlebar-end mirror finished the job. The more I ride it the better it seems to run. It cruises comfortably at 45MPH and easily accelerates to 55MPH. The dash board below has, left to right, the gas tank cap, a speedometer in MPH, and the Bosch key. This was a daunting project but there was a lesson to be learned here. No mater how rough the motorcycle looks you will be amazed at what can actually be cleaned up and put back in service. In actuality, other than the cost of the parts motor I have put surprisingly little money into this project and for well under $800 I now have a beautiful one-of-a-kind motorcycle for my little collection.
ps I do not think Barbers Museum owns a Progress scooter.
If you look cardefully at the above pictures you will notice that there are no rubber covers on the 3 pedals. It soon became apparent that they were unobtainable. I therefore asked my son Mike if he could print them on his 3D printer. He said no problem so I drew up a diagram for him showing their size and shape. He printed them using some very flexible black plastic. With a dab of contact cenent to hold them in place they fit snugly over the steel disks and looked great. A great finishing touch!