|
|
One day last year (2011) I was in the service department
at A & B Honda here in Mobile with my friend, David Hangen.
We noticed a nice twin-cam Honda CB450 in for service and I
mentioned that I would really like to have one of those.
David said I actually have one in my barn that I would gladly
sell to you. The story was
that a relative had owned it and was about to haul it to the junk yard
when David asked if he could have it.
The bike then sat in his open-sided barn for many years.
David said it was not running when he got it but that he thought
he remembered that the motor would kick over when he put it in there.
That sounded like a deal so Jim Arrington, a mechanic at A&B,
and I went out to look at it. When
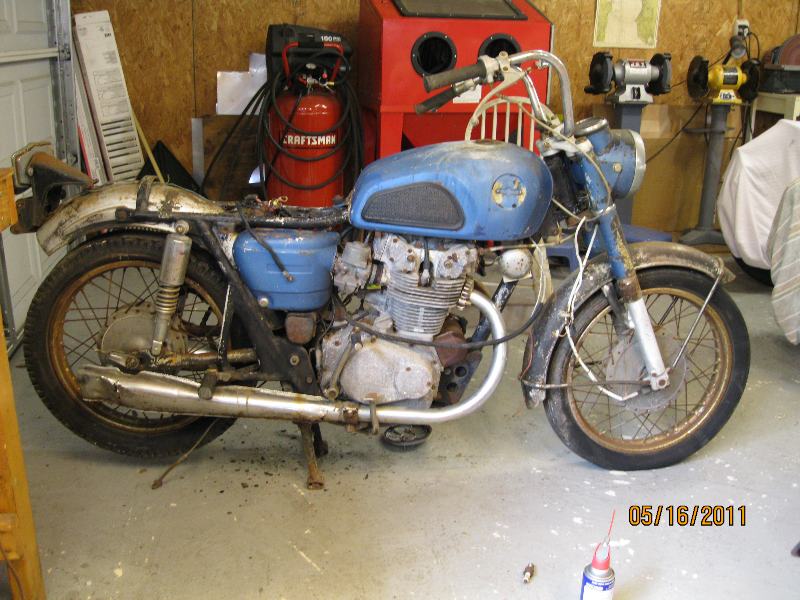
we got there it was worse that we could have ever imagined.
It was the typical junkyard hulk.
But on closer inspection we noticed that it was a 4 speed Black
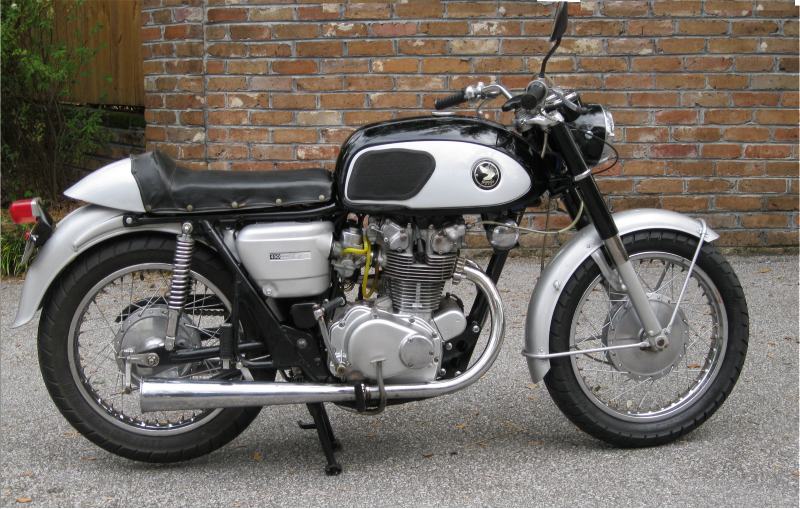
Bomber (made from 1965 to 1967). The Bomber was Honda’s first big bike
with styling akin to the 305 Super Hawk. This was one of many bikes that
Honda made that did not sell well at the time but went on to be very
collectable classics (other examples are the GB500 or the CBX).
The tank and mufflers were not Bomber but everything else was.
Unfortunately, the motor was stuck.
I was about to say “forget it, it’s too far gone” when Jim
spoke up and said he had a NOS speedometer for it that I could have.
That did it. The combo speedometer
and Tach nestled in the headlight was just too cool. I
figured I could build a bike around that speedometer.
I gave David $100 and hauled it home.
|
 |
What a mess! Rust
and dirt and leaves kept falling out of it continuously making a mess in
the shop. I took the left
case cover off and noted that the inside of the crankcase was actually
quite clean and rust-free. With
much penetrating oil in the spark plug holes and coaxing on the crank
nut I got it to turn about 180 degrees but that was it.
The motor would have to come apart to see what the problem was.
I was missing a few chassis parts but my friends came to my rescue. Jim Arrington donated the above-mentioned speedometer. The speedo in the bike actually worked but the numbers were so faded that you could barely read them. A face decal from Reproduction Decals would have restored it, however. Jim also found a left side cover, and one very nice 450 tank badge. Maurice Turgeau had a bomber rear fender that he had no use for and Jon Burk had a very rusty but correct tank that he would donate to the cause. That gave me all the sheet metal. I sent the frame and all of the bodywork out to the blast people who cleaned everything to bare metal.
|
 |
The tank was a particular challenge. It had been stored tipped up against the wall somewhere and the front one inch of the tank was rusted clean off. I was able to cut it back to solid metal and weld in pieces of 22g steel to reconstruct the shape. I found my little flux core welder worked best, especially when a heat sink could be held behind the weld. Make small short welds to prevent burn through. An angle grinder makes it look pretty. I then smeared Marine-Tex epoxy over the weld seams to seal it (Marine-Tex is gasoline-proof). I finished it with Bondo over the Marine-Tex to restore the contour. To be doubly sure it wouldn’t leak I lined it with Red Coat tank sealer. The side panels were a little too pitted to rechrome so I filled the rust holes with Bondo and painted them the same Toyota silver as the fenders. The tank came out really nice. I finished the frame, fork covers and headlight in black single stage acrylic enamel and the fenders tank and side covers in base coat-clear coat. |
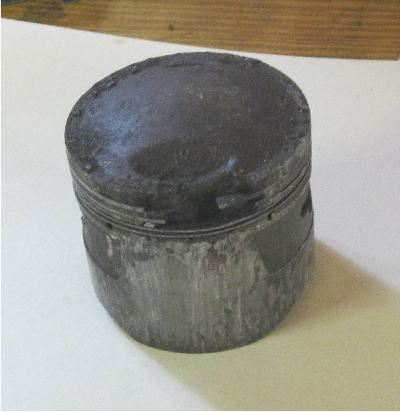 |
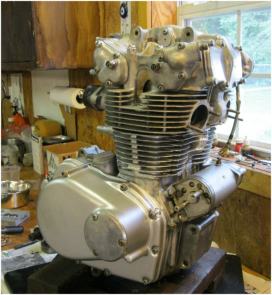
The motor revealed a hole burnt clean through the right piston. It was badly scored and had to be driven out of the bore. That is what kept it from turning over. I was looking at an expensive pair of pistons and a bore job. As luck would have it someone listed a used cylinder and pistons on eBay the following week which I won for $62. The bottom end, which is roller bearings, felt fine as did all of the ball bearings so I cleaned everything carefully and put the motor back together with new gaskets and seals. About that time I ran across a 1971 5-speed parts bike that seemed to have a good motor which I bought. I thought about swapping motors but I decided to stick with the 4 speed both because the numbers would be correct and I knew what was inside it. I used the stator, the air cleaners, and the carbs from the parts bike along with the wiring harness and the control cables. As it turned out it was good that I did not install the 5-speed motor. I latter gave it to Jim Arrington and when he put it in a bike it was found to have a bad rod bearing.
|
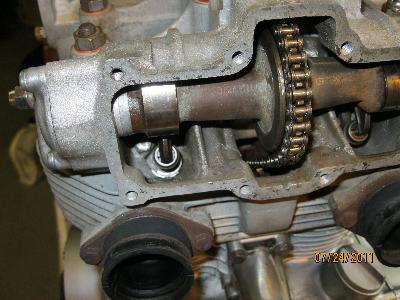 |
Look ma! No springs! One of the unique features of Honda’s twin cam 450’s was the use of torsion bar valve springs instead of coils. The little torsion bars are about 3” long and about 3/16” in diameter. At first I was nervous but they are easy to work with. After stripping the head I bead blasted it and lapped the valves. Assembly was easier than any head I have ever done. Stick the torsion bar into the valve fork, use a crescent wrench to twist the free end until it lines up with a hole in the side of the head, push it into the hole and lock it in place with a 6 mm bolt. Done! Note there are no valve springs in the picture. The torsion bars are inserted under the covers at either end of the cam. |
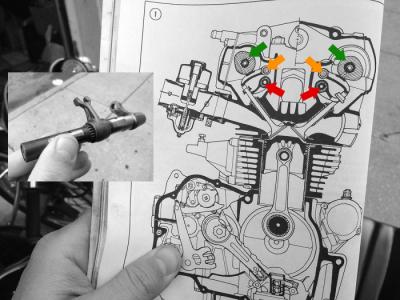 |
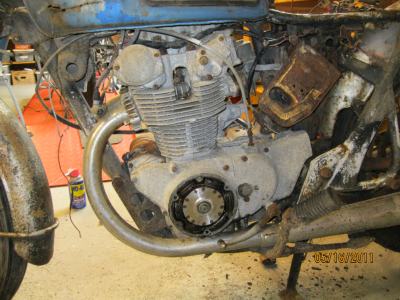
Here is how the torsion bars work. The inset shows a torsion bar. The actual torsion bar is a thin shaft that runs inside the hollow valve lifter shaft. The fork is positioned under the valve keeper and the lever on the end is twisted counter clockwise as viewed so the fork holds the valve closed under tension. The red arrow points to the torsion bar in the diagram. The cam (green) pushes the rocker arm (orange) down to open the valve against the torsion bar's tension. One end of the rocker arm is on an eccentric so the valve clearance can be adjusted by a screw on the side of the cam cover (see picture of the motor below). To adjust clearance you just start the motor (hot) and twist the screw until you hear clicking and then back it of to just where the clicking stops. |
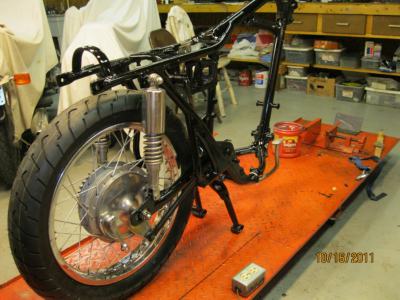 |
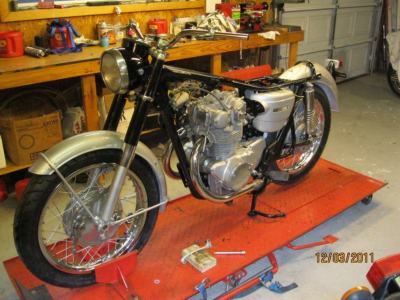
 The
motor is finished and the painted frame starts to come together. The
rims were rusted beyond ever being used but the hubs polished right up.
A trip to the local junkyard found a couple of 40 spoke chrome
rims that would be usable. I
bought a pair of new Shinco tires ($50@) and soon I had 2 descent
wheels. The sprockets were
good and all that was needed was a new chain which Carlos Forte
generously donated. Now it
was time to put it all together. The
motor is finished and the painted frame starts to come together. The
rims were rusted beyond ever being used but the hubs polished right up.
A trip to the local junkyard found a couple of 40 spoke chrome
rims that would be usable. I
bought a pair of new Shinco tires ($50@) and soon I had 2 descent
wheels. The sprockets were
good and all that was needed was a new chain which Carlos Forte
generously donated. Now it
was time to put it all together. |
 |
I was missing a headlight lens but I happened to see a Bomber in the VJMCC show at Barbers Vintage festival so I jotted down the part number on the light. I happened upon that very part at one of the vender booths later that day complete with a good rim for $10. It fit perfectly. Next was the exhaust. Although the bike was in awful shape the header pipes were not so bad. A few minutes with a Brillo pad produced 2 very usable pipes. |
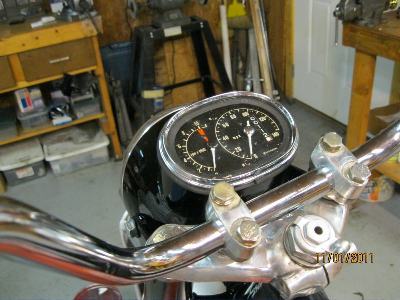 |
The dual speedometer and tach is just too cool. The bars are generic European bars from D&D Triumph-Ducati in Pensacola. I had to drill them to run the wires for the starter, horn and dip switch. |
|
|
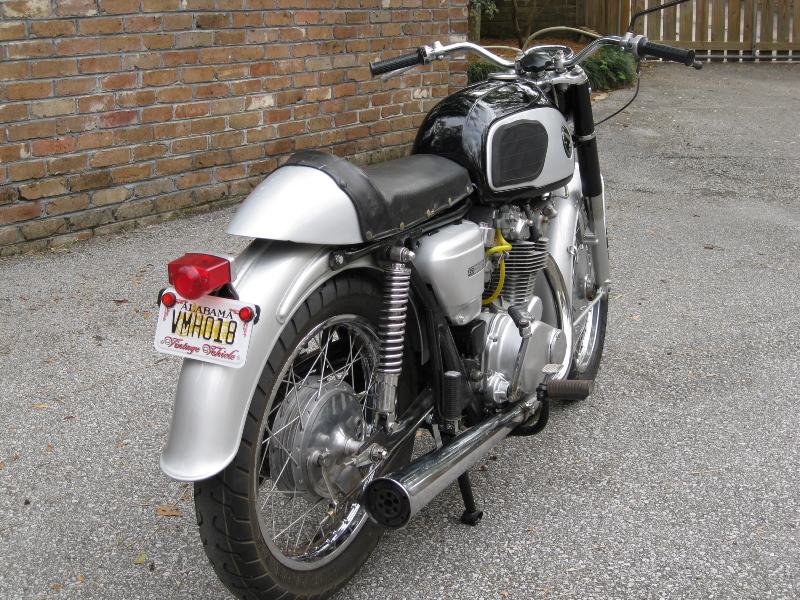
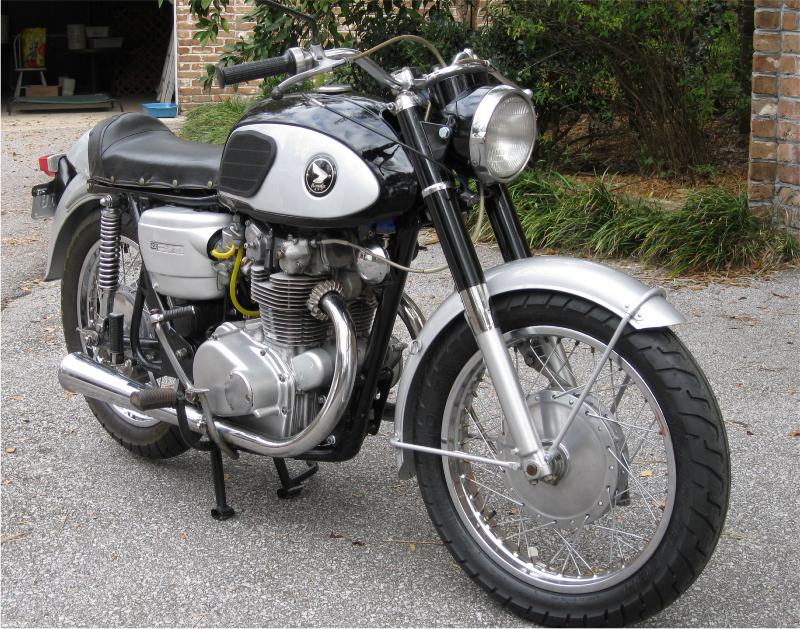
I did not have a seat. The seat on the parts bike was in good shape but to my surprise it would not fit even though it looked very similar. A look in the attic yielded a very rough Café Racer seat. I fabricated a mount for it and gave it a paint job to match the fenders. I bought a pair of Emgo megaphone mufflers from Dennis Kirk for $60 @ that fit the 1 3/4" stock pipes. Between the megaphones and the café seat I think they actually improved the looks over the stock configuration. Now I was close to being finished and it was time to think about tank badges. Jim Arrington gave me a right badge from his badge collection but he did not have its mate. We found one on eBAY that happened to be a left but it was NOS with a price tag of $150. After a few days I gave in and bought it. It was the most expensive purchase of the whole project. |
 Click on the picture to see a larger version. |
The electricals were off the newer parts bike. One big difference between the Bomber and the parts bike was the position of the light switch. The Bomber’s light switch was on the ignition key while the later model had it on the right handlebar. I really wanted to use the original levers and switchgear so I mounted a toggle switch under the tank on the right side by the horn. I used a double pole single throw switch. One pole turns on the lights while the second switches in an extra winding in the stator when the lights are turned on. If you look closely over the horn in the right front view you can see the toggle switch bat hanging down. |
|
|
After a great deal of fiddling with last minute details I
finally was ready to try it out. The gas tank had no leaks and the motor
started right off but it smoked like crazy and then oil started pouring
out of the points cover. I
had forgotten the oil seal where the cam extends into the points.
That is a hazard of building a motor 4 hrs per week. Some things
just fall through the cracks. That
wasn’t all bad because it proved that the oil pump was working and was
pressure-feeding the cams. That
was easily fixed and restarting it revealed that the smoke was from
copious amounts of assembly lube I had used and it soon quit.
A trip around the block revealed good clutch and transmission and
a running motor. It
took a while to sort out the carbs.
They have to be dead clean as the pilot jet has the tiniest bore
I have ever seen and the smallest particle will plug it.
Also, there are no springs or diaphragms in the constant velocity slides so
they have to move up and down freely with no corrosion on the sides.
The float height is 20 mm and although that seemed excessive
that’s what it needs to run. Finally,
the springs on the ignition advance were too weak and the spark would
not reliably retard when throttled down so it was slow to return to idle. At
first I thought it was an air leak but with the help of a timing light I
soon discovered it was the advance springs. Stronger
springs fixed that and she now runs very well. This
was Honda's first bike with a constant velocity carb and it is often
said that they are the worst carbs Honda ever sold. I would have
to agree.
Because this motor was built before counter balancers it does vibrate despite its 180 degree crank shaft. Also, it felt like it needed another gear. At forty MPH in top gear it is turning 4,000 RPM which is quite high by today’s standards. The motor is red-lined at 10,000,however, so it would still go plenty fast. The front sprocket was the stock 15 tooth but there is room for up to 17 teeth. I found one on eBAY and bought it. The effect was a miracle. There was no noticeable loss of torque but the RPMs at cruise dropped by 1,000. Now 4,000 rpm in 4th gives fifty mph rather than forty. Why didn't Honda figure that out in 1965? Epilog: In 2016 I sold the Bomber back to David Hangen (who's barn I found it in) . Have fun David! |