Removing the carbs on your GL1000
Ask any experience Honda mechanic what is the worst job on a GL1000 and he will invariably say working on the carburetors. The first time I tried to take them off my 78 model It took almost a full day trying to follow a Clymer manual. There is a simpler way. Just split the air box and remove each half intact. If you follow the steps outlined here you can remove or install a set of carbs in only 20 minutes.
Disassembly
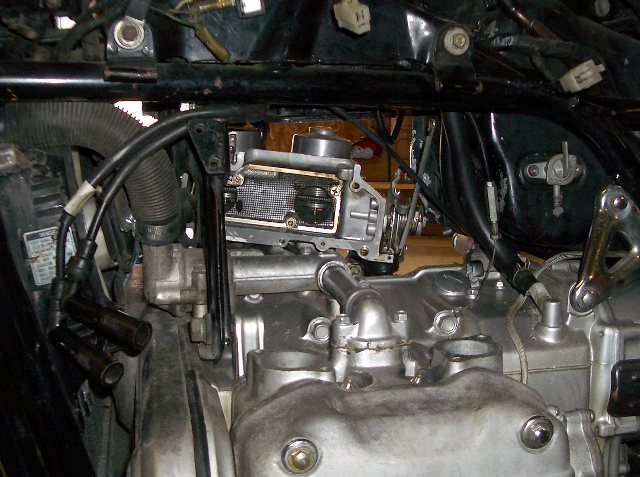
The first error I found in the Clymer manual was when they said lift the air filter box out through the top of the tank shelter. Mine was way too big to fit through the hole. Not a problem. Just remove the top and then the filter to expose two 6 mm bolts. Remove the bolts and lift the filter box as high as possible and secure it with a C clamp as shown in Figure 1. The Clymer manual said to unbolt the manifolds and slide the carburetors out the side. Fine except again the hole was about an inch too small to let them pass without taking off the manifolds and the air valve (I would rather not remove the air valve without having a rebuild kit). Also removing the throttle cables is a nightmare given the confined space in which they are placed.
Next remove the 5 screws holding the airbox together. There are 2 at the rear on the right side and 3 on the left: 2 at the front and 1 on the bottom middle. Then remove the 4 bolts holding the manifolds to the head on each side. Next unhook the 2 throttle linkage arms going from the central control unit to the left and right sides. Mine had small cotter keys in them. Finally, remove the choke linkage from the left side only. Again, a cotter key held it in place (don’t loose the small spring and nylon adaptor).
Now unhook the gas line at the fuel pump and remove the spark plug wires. Also remove the choke cable from the right side. At this point you should be able to lift out the left side carburetors. Set them aside.
Move the right-side carburetors so that you
have easy access to the throttle cables (see
figure 2). Remove the cables and lift out the right
bank of carbs.
Reassembly
Reassembly is essentially in the opposite order as above. Put the right side in first and be sure the throttle arms and choke linkage are arranged properly. Now you should attach the throttle cables. Be sure that the O rings are properly inserted in the manifolds and that they are soft and not flattened. The O rings like to fall out as gravity is in their favor. A dab of thick grease will hold them in place, however. Next bolt the manifolds firmly to the head.
The airbox is now in position to mate the
left side to it. Be sure the formed rubber gasket that fits
in the seam between the two air box halves is good and soft.
The two holes in the bottom of the airbox (see
arrows in figure 3) are the gas passages and a gas leak will
occur here if those O rings make a bad seal. Do not use any
gasket sealer here (especially silicone seal) as the gas will
just dissolve it and the residue will clog the carb.
Slide the left side in and fit the airbox
sides together. Put the 5 bolts in the airbox and tighten
them down. Now pry the left side carbs up and insert the O
rings in the manifolds. Bolt down the manifolds and finish
the assembly.
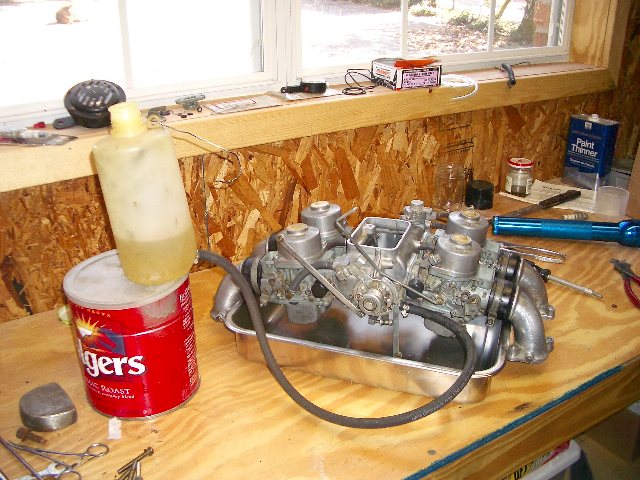
Testing for leaks
As the system is complex with many possible places for a leak it is worth testing it prior to reinstalling. Put the finished halves together and apply gas under pressure to them as shown in figure 4. I used a small test tank. If you do not have one you can make one by cutting the bottom out of the plastic bottle that 90 weight transmission oil comes in. Hold the tank at least 3' above the carbs for a full minute to pressure test them. There should be no leakage of gasoline either into the airbox cavity or out the manifolds. If there is then find the problem and fix it. Perhaps the float valves are not sealing. That is usually indicated by gas running out the manifold of the offending carb. Another possibility is that the O ring between the carburetor and the air box is not sealing. The incoming gasoline goes through a manifold in the airbox and then to the individual carburetors through a hole in the face of each carburetor's mounting flange. If the O ring between the carb and the airbox does not seal then gas will leak. I used Keyster kits to rebuild my carbs. They worked fine except the O rings around the float valve bodies were too small. That caused the float bowls to flood at idle filling the airbox with gasoline. The test system described above quickly found the problem.