Building the Dragon Bike
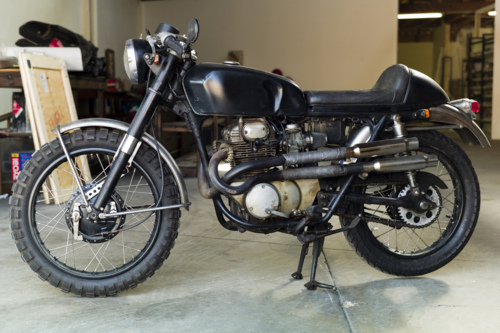
The best selling novel "The Girl with The Dragon Tattoo" was made into a movie both in Sweden and in Hollywood. In it the heroine, a punk rocker with a large tattoo on her back, rides around Stockholm on a motorcycle. In the Swedish version she rides a nondescript dirt bike but in the American production she rides the cool Honda CL350 Cafe Racer shown below. My friend Wiltz Wagner was blown away by this bike. If you haven't seen the movie you can see her riding the Honda in this youtube video https://www.youtube.com/watch?v=l23hFSfp0b4&noredirect=1
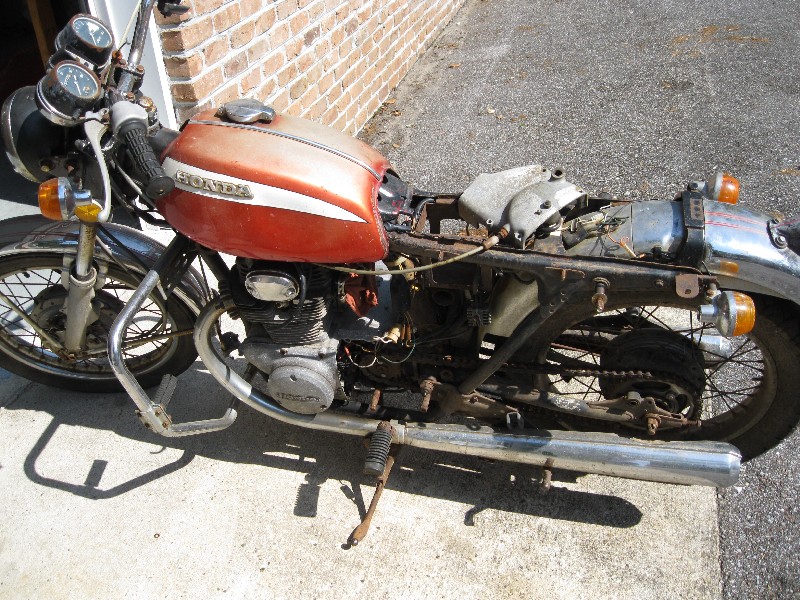
I happened to know where I could buy a Honda 350 project pretty cheap and I told him that I would be happy to build a similar machine for him in trade for an Aprillia AF1 replica he owned. Jim Arrington had a CB350 with an engine that would turnover with compression and looked like it would run. In addition, he had a parts bike, sans a motor, that he would throw in. He also included enough parts to build a set of carbs. After assembling the carbs and cleaning up the wiring I was able to start the motor and take it for a test drive. The motor sounded ok but it would jump out of 3rd gear when the slightest throttle was applied. Unfortunately, the motor would have to come apart. The bike was completely dissassembled and the frame parts, tank, fenders and a pair of rusty rims went to Phil Ostercamp's bead blast shop in Grand Bay Alabama. Phil blasts them rust and paint free and primes them with epoxy primer for a very reasonable price.
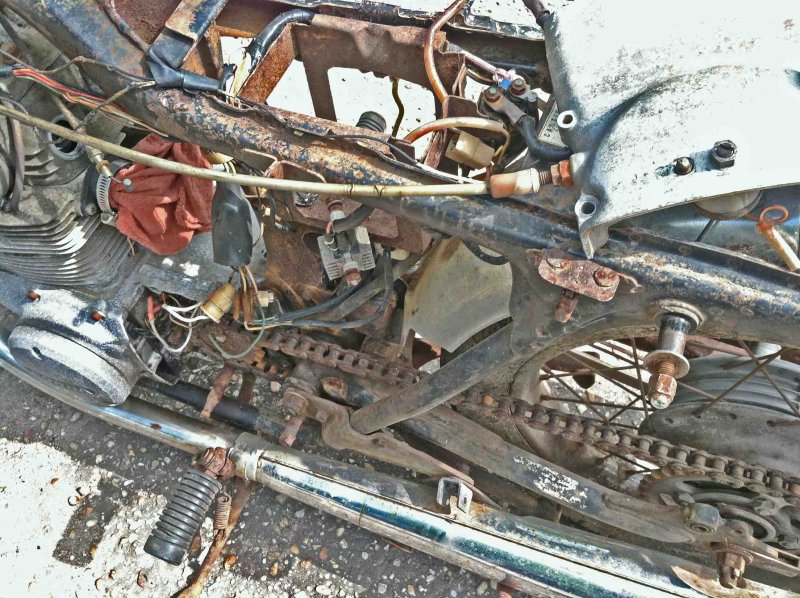
The wiring looks bad but in fact it was quite serviceable with no breaks in the insulation. Missing connectors were replaced and extraneous wires were discarded.
The next order of business was the motor which was taken completely apart. Although the motor sounded descent in fact it was badly worn. The pistons were loose and the rings were worn way beyond their service limit. The plastic cam idler wheels were worn down to nubins and worst of all both of the rod bearings had unacceptable free play. The motor would need some new parts. Jim Arrington gave me a set of used over-size pistons and a cylinder that could be bored. I had Steve McClintock bore the cylinders to the pistons. I found the rest of the NOS motor parts (cam chain, idler wheels, rings, gaskets, seals, etc) on eBay including a good used crankshaft assembly. It included the 4 main roller bearings as shown below.
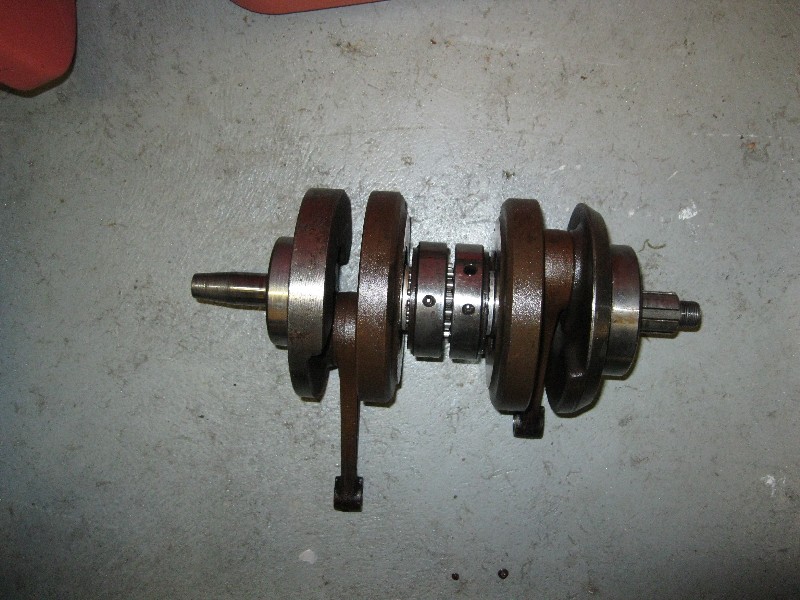
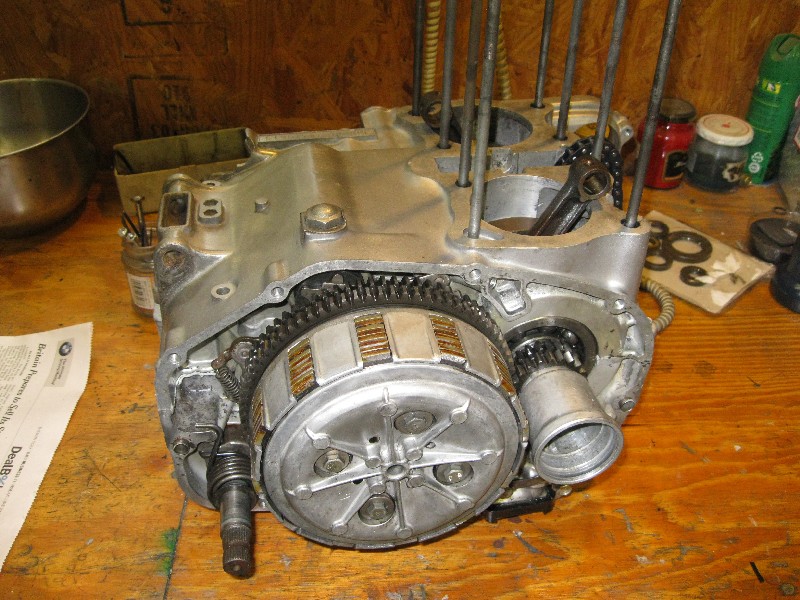
The bottom-end was assembled using good transmission gears and the new used crankshaft assembly. Note the cup on the end of the crankshaft. That is the 1960's style oil filter. Oil is pumped under pressure into this spinning cup. Any particulate matter is packed in the walls of the cup by centrifugal force while the clean oil flows out of a hole in the center of the cup's cap to feed the cam and crank bearings. The sludge in the cup can be cleaned out periodically through a removable cover on the side of the motor. Contrast this to the Triumphs and BSAs of the day. The same principle was used to pack the sludge in their hollow crank pins. The difference was that in the British bikes the entire motor had to be disassembled to remove the sludge. Failure to do so resulted in clogging up the oil passages to the rod bearings and catastrophic failure of the engine. In the center is what looks like a very conventional clutch. If you look closely, however, you will see a double row of straight cut gears. The teeth on these two rows are staggered so as to cut the gear noise in half without sacrificing any strength. That's engineering!
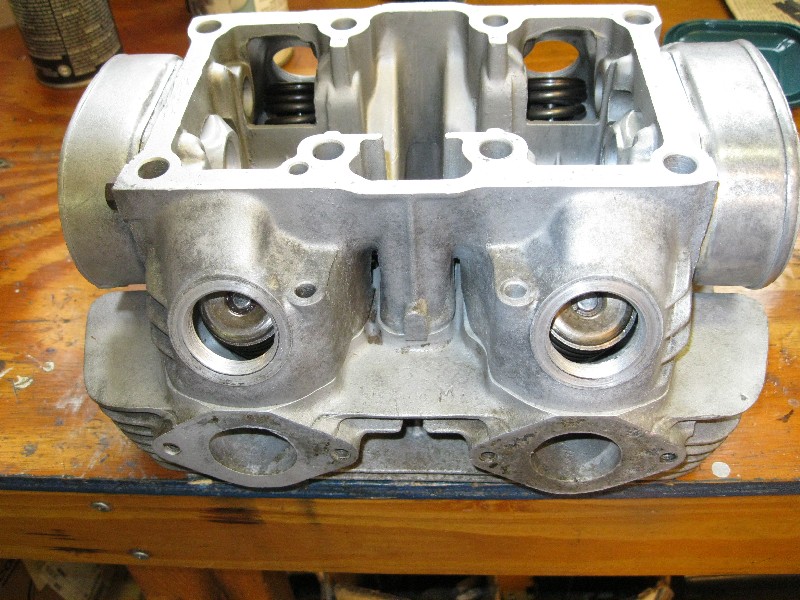
The head was bead blasted and the valves were lapped. The valves are operated by a single overhead cam running in plain bearings with pressure oil feed. The valves use bee hive valve springs to prevent them from floating at 9000 rpm.
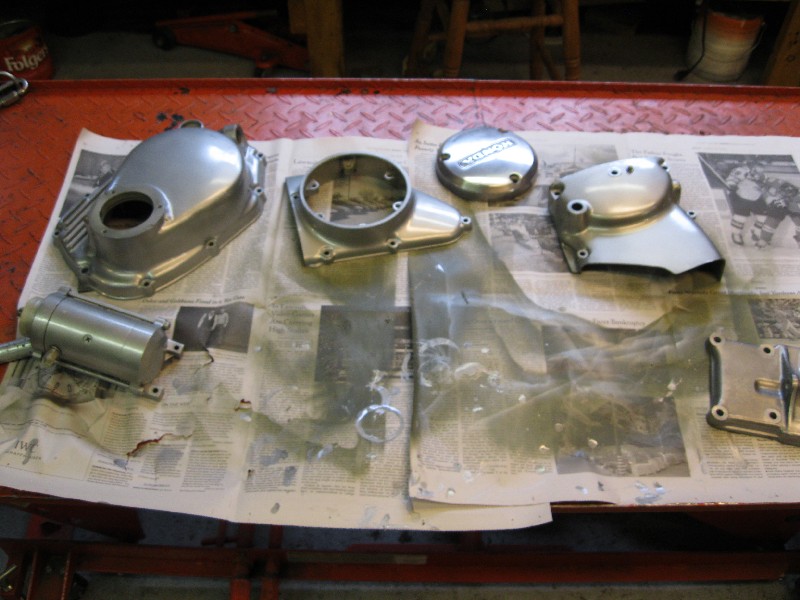
The side covers were painted with automotive acrylic enamel with a polyurethane hardener which is very gasoline resistant. Spray can enamel is not. The rest of the engine parts were bead blasted and received a light coat of clear enamel to seal them.

The Frame parts came back nicely cleaned up and primed. The chrome on the fenders was too far gone to save so I decided to paint them. The tank was very rusty inside and it was cleaned using the phosphoric acid included in a Kreem kit. I had picked up a hump back seat and some clubman bars from Hotwing Dave's booth at Barbers. So I had all of my chassis parts. The fenders were painted silver using base coat/clear coat and the frame was painted with gloss black epoxy enamel. Finally, the tank, fiberglass seat, headlight bucket and chain guard were painted with a black satin single stage acrylic enamel with a polyurithane hardener.
The frame I was using was from a 1972 CB350 which came with a low exhaust system but the movie bike had CL350 high pipes. CL pipes always bring top dollar on eBay but as luck would have it a parts bike with very clean high pipes turned up for $200. It had a nice set of CL pipes and all of the mounting hardware. It also had a lot of small parts that were either missing or in poor shape on the project bike. Wiltz wanted the pipes painted flat black with asbestos wrapping as featured on the movie bike so I painfully bead blasted the nice chrome so it would hold paint. I wrapped the pipes with fiberglass tape obtained from eBay. The tape must be soaked in water and wrapped while still wet. It then shrinks tight as it dries. There are many good videos on YouTube that show you how to do this properly.
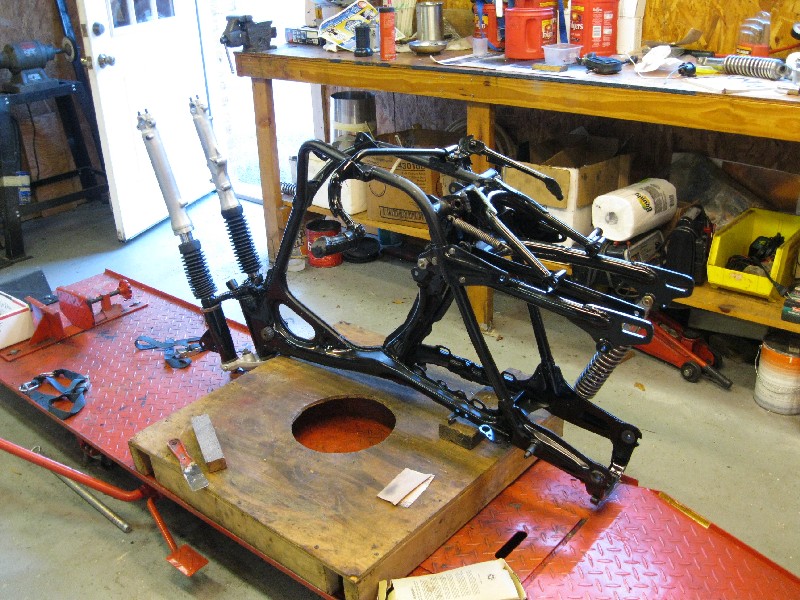
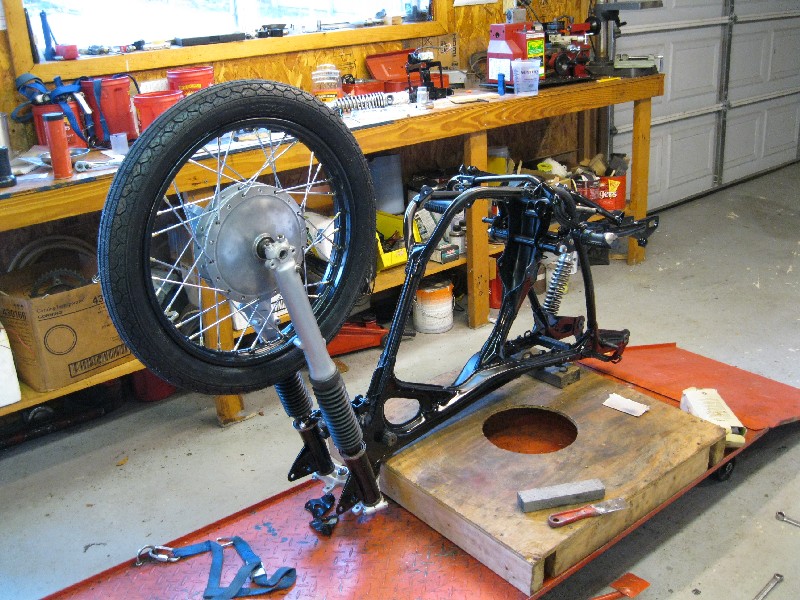
Time to start assembly. I used the upside down building method. That makes it easy to assemble the front forks, center stand and the swing arm. The loose bearings are stuck on the races using very thick grease. The grease holds them in place as the steering head nut is tightened. Next the headlight holders are put in position and the fork tubes are slid into place. This bike originally had naked fork tubes with rubber dust covers. The chrome on the fork tubes was pretty dingy so I hid it with some gaiters. The movie bike had sheet metal covers but I did not have a decent set.
The de-rusted rims were sent to a shop here in Mobile where they received black powder coat. While these rims were beyond ever being plated again they looked like new in powder coat. I found a set of chrome spokes with brass nipples on eBay for $50 for both wheels. It took a month to get here from Thailand but the wait was worth it. They fit perfectly. While the wheels were disassembled I bead blasted and polished the hubs and cleaned the bearings.
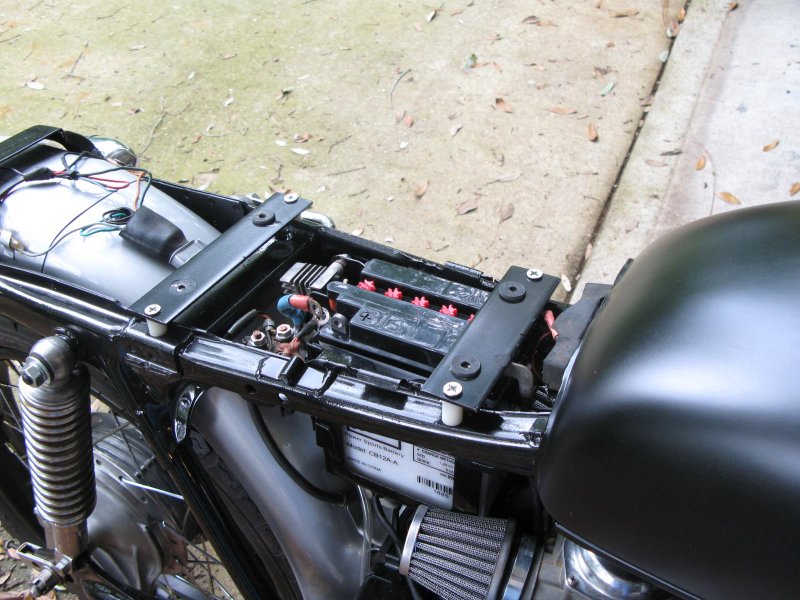
After putting on the wheels the bike is flipped upright and its time to start fitting the sheet metal. The seat is mounted by two 1.5" x 1/8 inch steel cross pieces (see the picture below). Holes were drilled in the frame and tapped to 1/4 x 20 threads. Four 3/4 inch spacers were used to raise the crosspieces so the seat would clear the battery. One cross piece was ahead of the battery and the other behind it. 4 holes were drilled through the seat base and into the cross pieces to hold the seat in place. The holes in the cross pieces were also threaded so no nuts would be required. Finally I super glued 4 rubber washers to the cross bars to keep the seat base off the painted pieces.
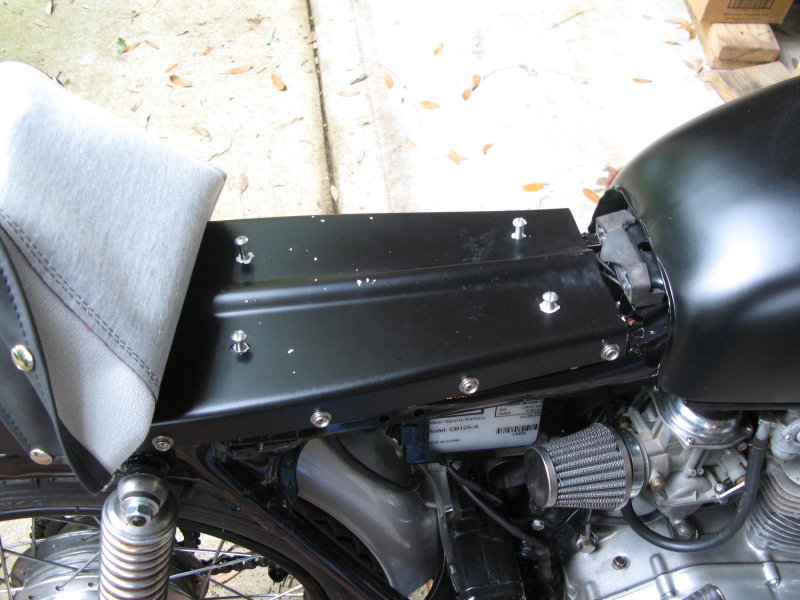
To mount the seat 4 round head screws are tightened to hold the seat pan in place and the seat cover and foam are snapped on. To remove the seat to get to the battery, unsnap the seat cover and remove the 4 screws.
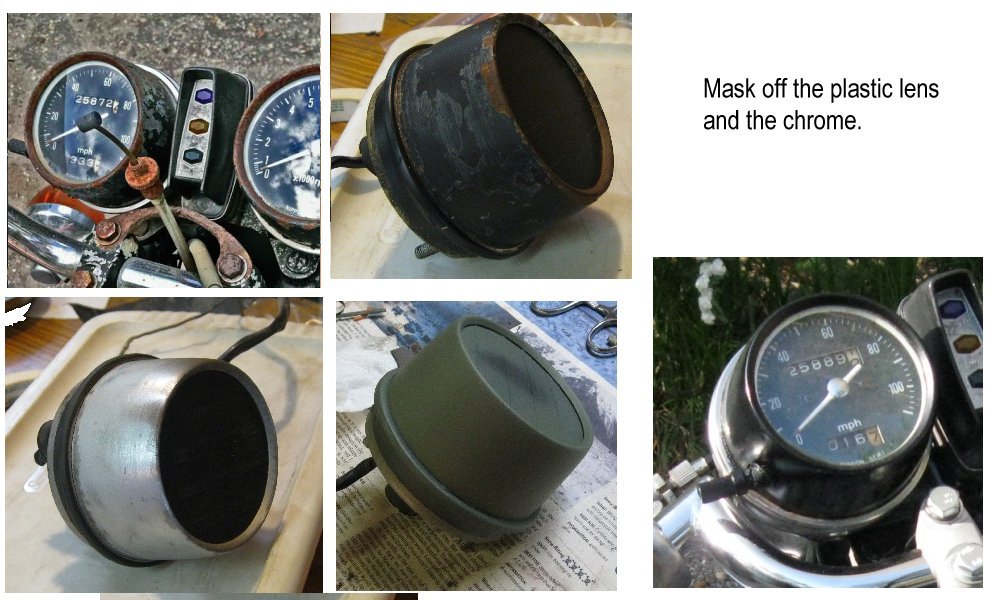
The instruments on the bike looked awful but incredibly they both worked. I tested them with a short piece of speedometer cable that I put in a reversible electric drill. Run the drill backwards and the cable should cause the needle to swing. The most common problem with these magnetic instruments is that the piece that receives the cable gets stuck and won't turn. Usually a little heat from a torch and some WD-40 and coaxing from a small screwdriver gets it turning freely again. I removed the speedometer from its mounting and masked off the chrome trim and the plastic face. I then sanded the the metal housing until it was rust free with 400 water sand paper. I primed it with zinc chromate primer and then 2 coats of gloss black Rust-Oleum paint from a rattle can. After I removed the masking tape they looked fine.
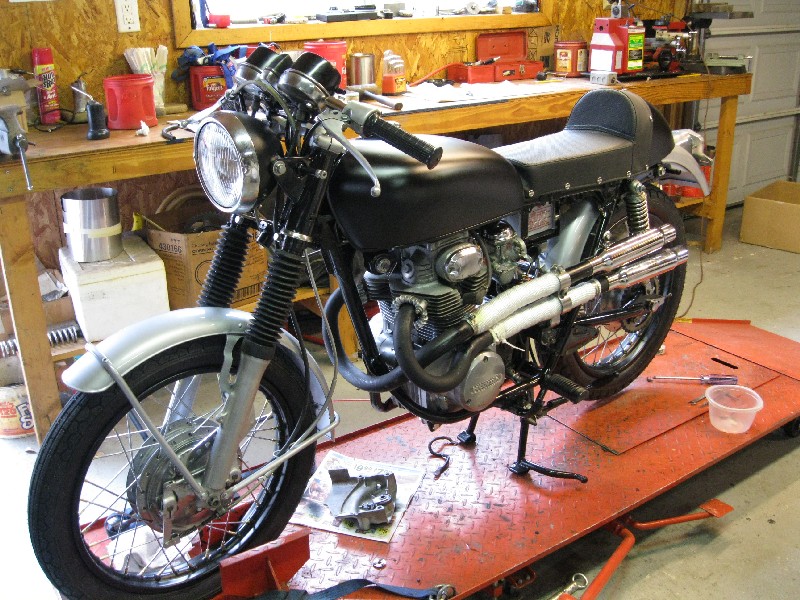
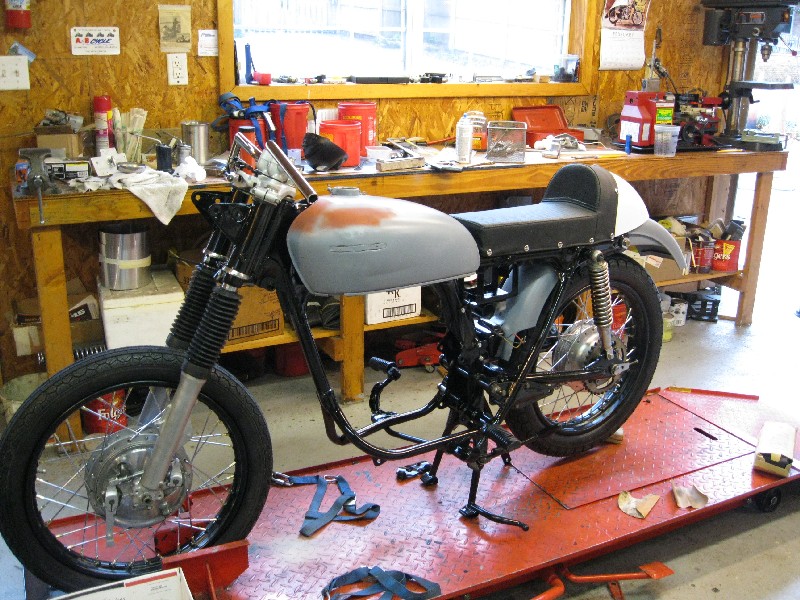
The fenders are in place and the motor is installed now it is time to add the clutch cable and chain and wire up some turn signals. I used the original switch gear. I blasted the paint off of them and polished the aluminum housings. I cleaned and lubricated the switches and mended all of the bare and frayed wires. The wires were originally routed inside the handlebars but that was not possible on the Clubman bars. I filed an exit hole for the wires on each housing and routed the wires along the bars. Keeping true to the movie bike I used shorty mufflers on flat black pipes. I hated the idea of painting the sheet metal with flat black paint (think primer) but Wiltz was insistent on this point. Fortunately, the satin finish paint I bough turned out to be beautiful. It does not look like primer. In fact, I actually cleaned it with Honda Polish before I took this picture. The polish actually brings up the satin texture.
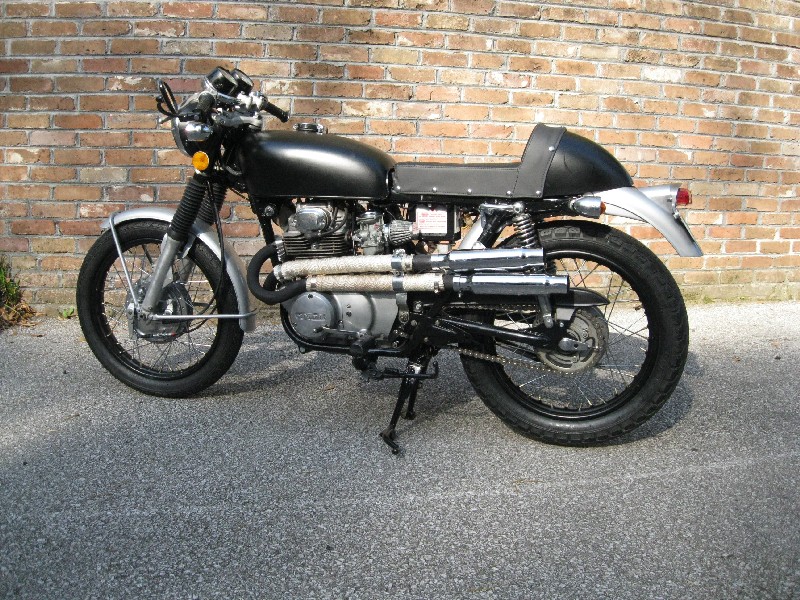
Here is the final product ready for a test ride. Just like the movie bike I retained the stock fenders and used a chopper-style tail light/license plate holder. The motor started right up but the transmission still jumped out of 3rd gear. Obviously there was more to the transmission problem than just rounded corners on the shift dogs. That meant a quick motor pull. Fortunately the horizontally split crankcase facilitates transmission work. I turned the motor upside down on the bench, removed the left and right case covers, and took the bottom of the crankcase off and the transmission was staring me in the face. The 2 shafts can be lifted out and the shift drum and shift forks are right below them.
![]()
3rd gear (the center set) looked fine and the dogs were not rounded and its shift fork was straight. Why wouldn't it stay in gear? Then I noticed that there was a worn corner on the shift drum's track that allowed several mm of slop in the shift fork exactly when it was in 3rd. Amazing how such a little thing could cause so much trouble. Fortunately, I had a good used shift drum and that finally fixed the transmission. There is no gasket between the case halves. The surfaces are smeared with a thin layer of Honda Bond sealer (get it at the Honda shop) and bolted back together. Back in the bike several hours later, the transmission was finally smooth and positive in all 5 gears.
The bike is zippy on the road. Red lined at 9,000 rpm it likes to rev. With the stock gearing the speedometer tracks the tach in 5th gear. Thus if you are doing 50 mph the tach is registering 5,000 rpm. That means that it would red line at 90 mph. The motor is built like a Swiss watch and was made to hum along all day at 6,000 rpm. The rider position is quite comfortable with a little weight on the palms. The performance is zippy and the shorty mufflers give it a real bark.

The Clubman bars nicely surround the gauges. Turn signals and horn on the clutch side, head light controls and starter on the throttle side. Note the wires exiting the right switch box. The center lights are high beam, turn indicator, and neutral.
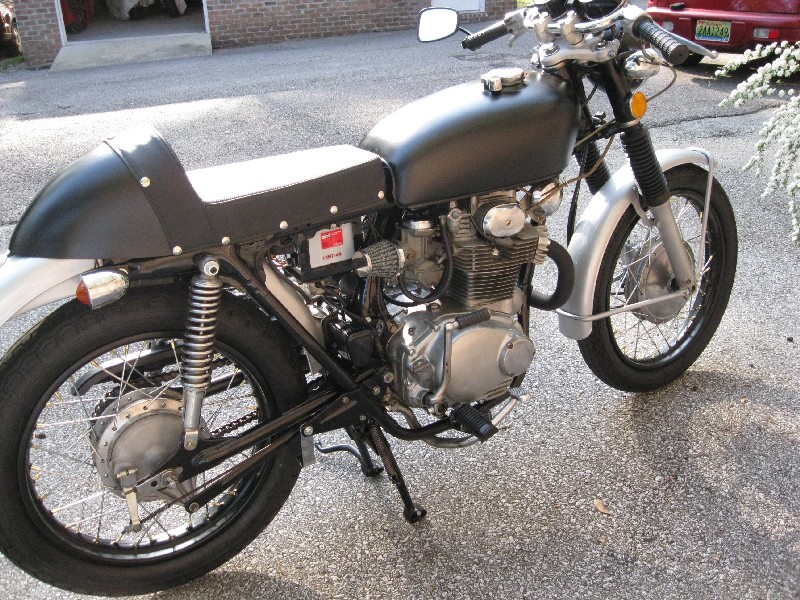
The constant velocity Keihin carburators breath through conical air filters. Notice the bullet style turn signals. The CB350 frame uses the low mufflers to hold the centerstand in place. Since I was using high pipes I had to hang a bracket from the right muffler mount to keep the centerstand out of the chain.
Posted April 2014