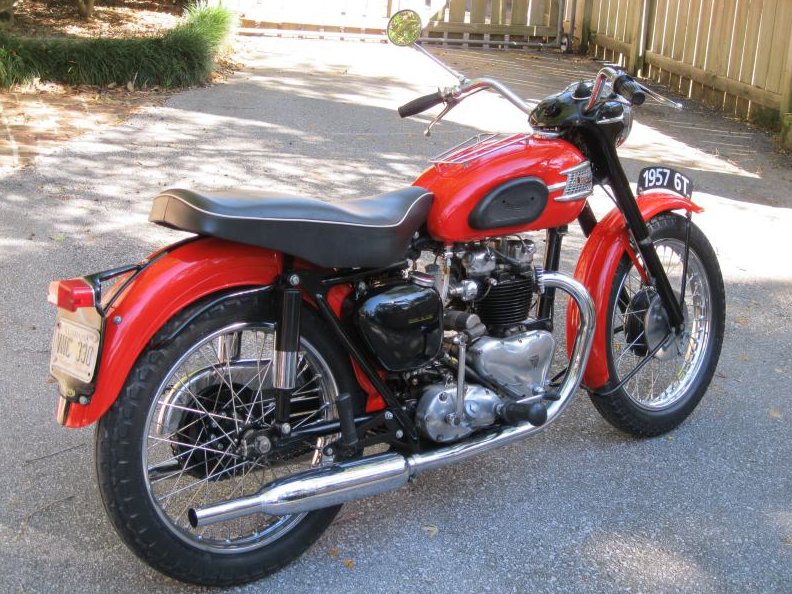
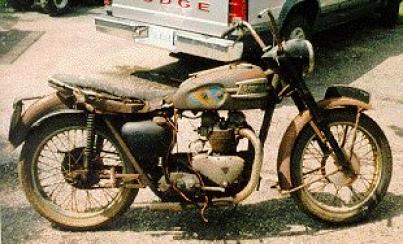
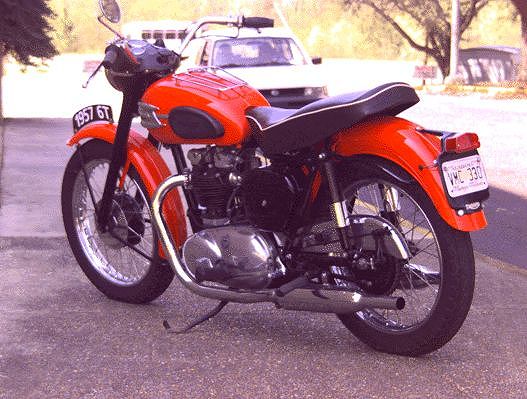
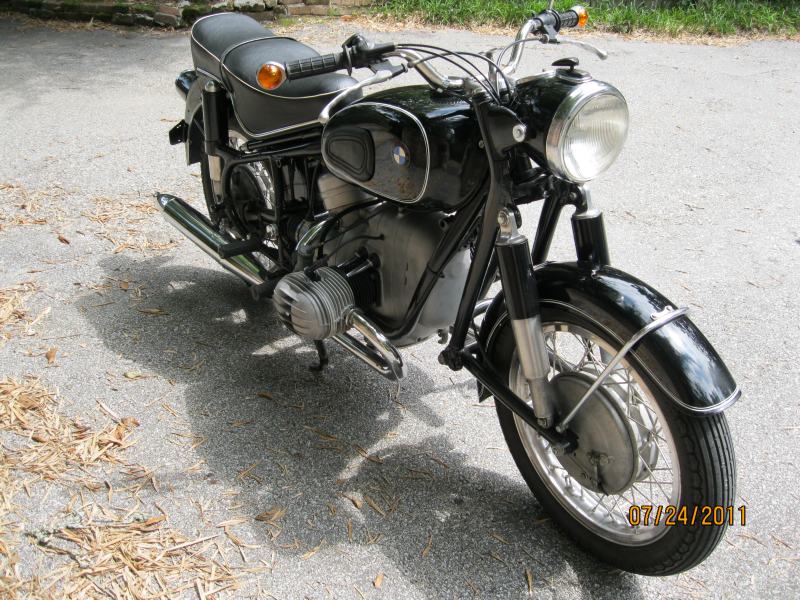
In this article I show two examples which I restored recently. The first is a 1957 Triumph 650cc Thunderbird and the second is a 1963 BMW R50/2 both of which I obtained in running order. The before pictures shows that both had lots of rust and had generally been abused. Actually this is the best condition in which to find a good restoration project because:
Click here to see the before picture
Click here to see the right side
Both restorations were very straight forward. First, I disassembled each bike and separated it into three piles: engine stuff, frame and sheet metal and things that need replating. I have a friend with an industrial bead blaster. The cabinet is large enough to put an entire frame inside. Everything was blasted down to bare metal. If a bead blaster is not available you can take parts to a sand blaster but beware the sand cuts the metal and leaves a rough finish. A little emery cloth will smooth it up again so sand blasting is better than nothing. As soon as I returned home I put a coat of primer on everything before it rusted. By the way never put a whole motor in the bead blast cabinet. No matter how well you think you have ports covered the beads will get inside. Assembled motors are best cleaned with gunk, wire brushes, mag wheel cleaner and lots of elbow grease.
After the primer I sprayed the frames and fittings with automotive black enamel. I keep saying that I will powder coat one but I never have. Paint is too cheap and easy. The fenders and tanks went out to a body shop. All my paint jobs look home-made so this is one place not to skimp. Get a good paint job and have the dents and dings corrected by a pro. I obtained an exact match of the original color from Don Hutchinson Cycles Classic Triumphs - Painting, Paint Supplies, Chroming 116 Foundry Street - Wakefield, MA (781) 245-9663
 I took the triumph motor completely apart although
it turns out that it really didn’t need it. Instead of an
oil filter Triumph fitted an over sized journal in the crank pins.
Centrifugal force would pack the sludge in the outer aspect of
this journal and Triumph fitted a handy plug in the end of the
crankshaft so that the sludge trap could be cleaned out. If the
sludge trap completely filled up it would cause a catastrophic
loss of lubrication to the rod bearing which would send the rod
through the cases, the sad end of many a Triumph engine. Riders
in the 50s and 60s thought nothing of a complete tear down every
10 or 15 thousand miles. To cut a long story short the sludge
trap was amazingly clean. This was a good time to put the pushrod
tubes in the chrome pile and polish the manifold and rocker boxes.
Aluminum polishing is done with lots of water sandpaper and elbow
grease. Then polish with a buffing wheel using Tripoli polish and
finish the job with Simichrome. A new set of rings, a valve job,
and one main bearing later the motor went back together.
I took the triumph motor completely apart although
it turns out that it really didn’t need it. Instead of an
oil filter Triumph fitted an over sized journal in the crank pins.
Centrifugal force would pack the sludge in the outer aspect of
this journal and Triumph fitted a handy plug in the end of the
crankshaft so that the sludge trap could be cleaned out. If the
sludge trap completely filled up it would cause a catastrophic
loss of lubrication to the rod bearing which would send the rod
through the cases, the sad end of many a Triumph engine. Riders
in the 50s and 60s thought nothing of a complete tear down every
10 or 15 thousand miles. To cut a long story short the sludge
trap was amazingly clean. This was a good time to put the pushrod
tubes in the chrome pile and polish the manifold and rocker boxes.
Aluminum polishing is done with lots of water sandpaper and elbow
grease. Then polish with a buffing wheel using Tripoli polish and
finish the job with Simichrome. A new set of rings, a valve job,
and one main bearing later the motor went back together.
The worst thing about early English bikes is the whitworth hardware. Never throw away a whitworth bolt, you never know when you might need it. I am not a purist so wherever a nut is used a stainless steel SAE bolt was substituted. Most of the original nuts and bolts were badly rusted. I was able to zinc plate some of them but my plating is a hit or miss proposition. Brake arms were painted with hammer-tone silver from a rattle can. The hammer tone looks pretty good and I use it a lot. The remaining bolts and nuts were wire wheeled to remove rust and after tightening painted with clear lacquer to keep them from rusting. I like this better than silver paint.
The tanks were treated with a Kreem kit which first etches the tank with phosphoric acid. These kits are great. Two days soaking removes the internal rust and a coating of white Kreem fills in any pin holes (all included in a $25 kit). The kit gives a permanent lining. It is a good fix for all but the worst of tanks. A word of caution. be sure all rust is gone before applying the Kreem. If Kreem is applied over rust it will fail. Rust quickly grows under the Kreem and will bubble it up and eventually make more leaks. Also avoid strong acids. I once filled a tank with a gallon of muriatic acid and in 10 minutes it dissolved an aluminum fitting on the bottom of the tank. It all ran out on my shop floor and filled the room with lung-burning fumes. Also, the residual chloride fumes continued to rust everything in my shop for the next year. It was not pretty. Stick with the phosphoric acid. It may be slow but it is also safe. A new set of pipes, an after-market seat, and a final assembly yielded the bike you see here.
Click here to see the before
picture
Click here to see the side view
 The BMW was a similar story but in that case I did not
completely renew the motor. I did remove the heads (so easy on a
BMW) and lapped the valves. The bores looked a little rough but
it did not smoke so I left them be. The magneto coil was bad so
it was either get a new one ($250) or improvise. I chose the
latter. I installed a Honda dual 6-volt coil under the tank (both plugs fire at
once on a BMW). I
used the hot wire to the horn for excitation and connected the
kill switch wire to the points side of the coil. That made it
battery and coil ignition rather than magneto and it runs fine. By
the way the BMW coil sparks from plug to plug. Thus if you pull off a plug
wire you will open the circuit and both plugs will stop firing. If you are
checking a plug wire to see if it has spark, be sure the other wire is connected
to a grounded plug.
The BMW was a similar story but in that case I did not
completely renew the motor. I did remove the heads (so easy on a
BMW) and lapped the valves. The bores looked a little rough but
it did not smoke so I left them be. The magneto coil was bad so
it was either get a new one ($250) or improvise. I chose the
latter. I installed a Honda dual 6-volt coil under the tank (both plugs fire at
once on a BMW). I
used the hot wire to the horn for excitation and connected the
kill switch wire to the points side of the coil. That made it
battery and coil ignition rather than magneto and it runs fine. By
the way the BMW coil sparks from plug to plug. Thus if you pull off a plug
wire you will open the circuit and both plugs will stop firing. If you are
checking a plug wire to see if it has spark, be sure the other wire is connected
to a grounded plug.
Wheels are always a problem. On the Triumph I had the rims replated and relaced them with Buchanan stainless spokes (Ph 626 969 4655). For the BMW the wheels were too far gone. I found a parts bike for $100 that had good alloy rims and a pretty speedometer. I bead blasted the hubs and laced the rims with new stainless spokes. A set of dirt bike handlebars matched the BMW bars very closely when I sawed 1" off each end. After a black paint job on the sheet metal, a pinstripe artist here in Mobile (Don Tanner 251 649-5397) duplicated the BMW pinstripes perfectly. I decided to simply replace the pipes and mufflers. The Schorsch Meier seat went to a local upholstery shop and they did a fine job. Seat covers are also available from Bench Mark Works in Mississippi. In 2009 I decided to pull down the motor. I had noticed that the generator light would come on when the clutch was pulled. Examination showed that the crankshaft would move forward about 2 millimeters indicating a bad main bearing. I also was worried about the sludge traps (pie pan looking discs mounted on the crankshaft that direct oil to the rod bearing and also concentrate sludge). When they get full of sludge the rod becomes starved for lubrication. Mike Porter here in Mobile did the bottom end and sure enough the front main was toast. Other problems were a sheared key in the flywheel which made the timing marks useless. Happily the rod bearings were fine. All ball bearings and seals were replaced and the cases cleaned. The heads received new exhaust guides and went to Bob's BMW in Maryland to have the exhaust flanges repaired. They build them up with weld and cut new threads for $135/head. They came back beautiful. I also had found an ignition coil for the magnito so I converted it back to original.
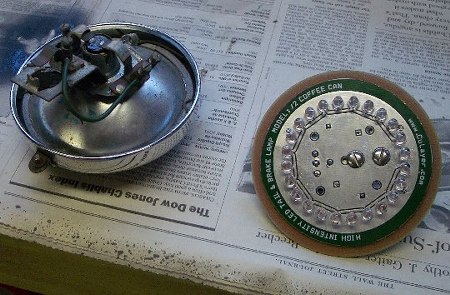
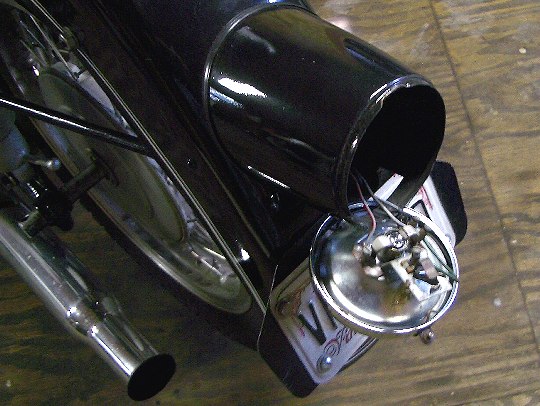
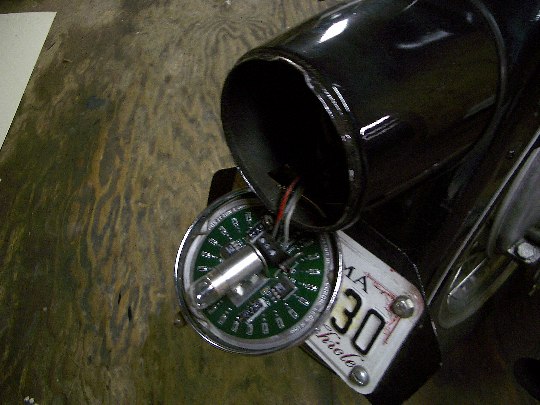
Brighten up that 6V Tail Light
The installation for my R50 took only 15 minutes. I
just removed the tail light rim, popped out the 4 retaining springs.
replaced the old reflector with the LED circuit board, and put it
back together.
Click here to see the original
tail light.
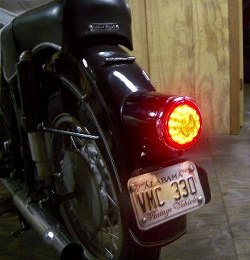
Click here to se the upgraded
version.
Workmanship is first class and man is it bright.
The heart of the unit is 24 high intensity LEDs. Twelve diodes serve as a
tail light and the other 12 as a brake light. It should be noted that
they still uses a 5w incandescent bulb for the license plate light and a
socket for that is provided
on the back side of the circuit board. The unit I used
only fits the "coffee can" style taillight found on most of the BMW models
R27-R69 that were sold in the 1960's. Although James no longer sell this model
he has a replacement that now fits in the original bulb socket. It is much
brighter than the $10 LED bulbs you buy on line. http://www.culayer.com/products.htm . Now if he could just
solve the dim headlight problem.
 |
 |