The Benelli in the Attic
My acquaintance with the Benelli began about 10 years ago while visiting the garage of Nigel Smith, a local vintage bike enthusiast. He had a nice collection of running and not-running bikes. Among them was an interesting looking 1972 Benelli 650cc Tornado. The story was that the motor that would run but the transmission was locked up. Not knowing where to get parts Nigel simply added it to the collection. The speedometer showed only 2600 miles. Several months later Jim Arrington acquired it in a trade with Nigel. Jim invited me to join him in opening the motor to assess the damage.
The motor is a 642cc parallel twin using pushrods and 2 valves per cylinder. The stroke is very short with large pistons. The crankcase splits horizontally Japanese style so, once out of the frame, it was easy to pull the bottom off and have a look at the transmission. It was a 5 speed using three cast iron shift forks, one of which was broken. It looked like the bike had been laid down as the shift lever was bent as was the brake pedal. The crash obviously over-stressed the shift fork and broke it. Other than that, everything looked fine. While Jim was wondering where a shift fork for a Benelli might be found another local vintage bike friend, Steve McClintock, saw it in Jim's shop and coveted it. Steve quickly bought it and began searching for parts and information.
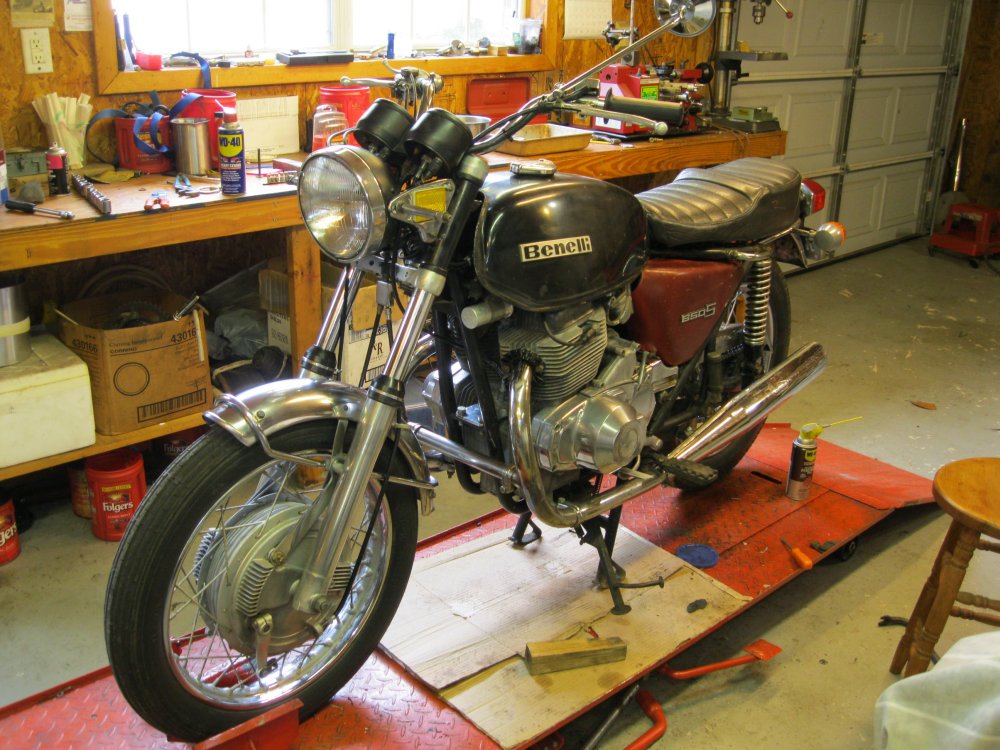
The Benelli minus its engine. Notice the bent brake pedal and silver paint on the rims
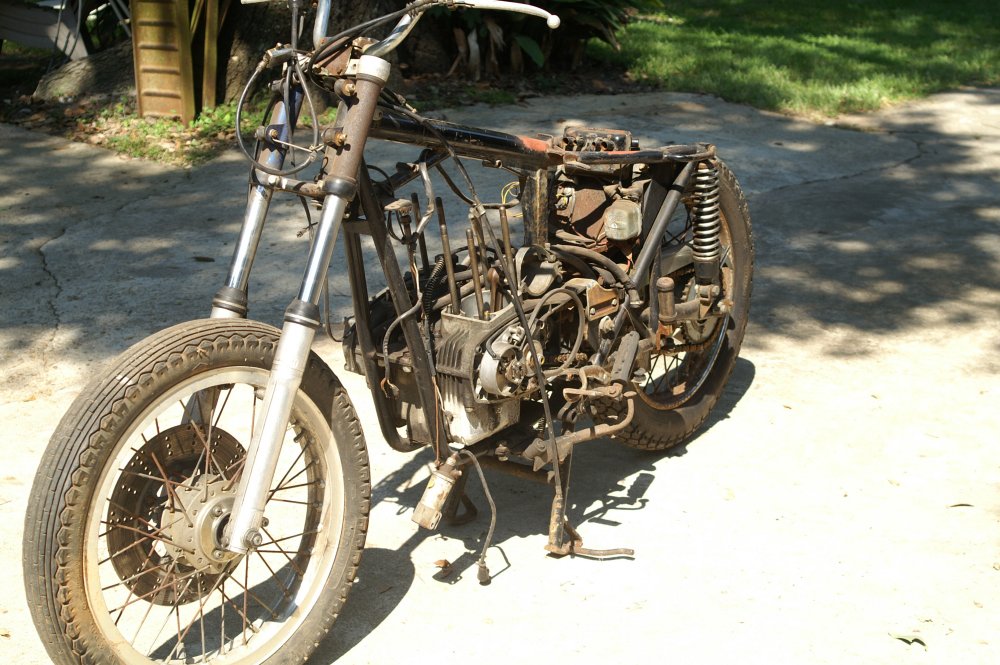
The parts bike. The engine is a manual start
with a generator but many of the parts are common to the 2 bikes including the transmission.
The front wheel with the disk brake is Yamaha.
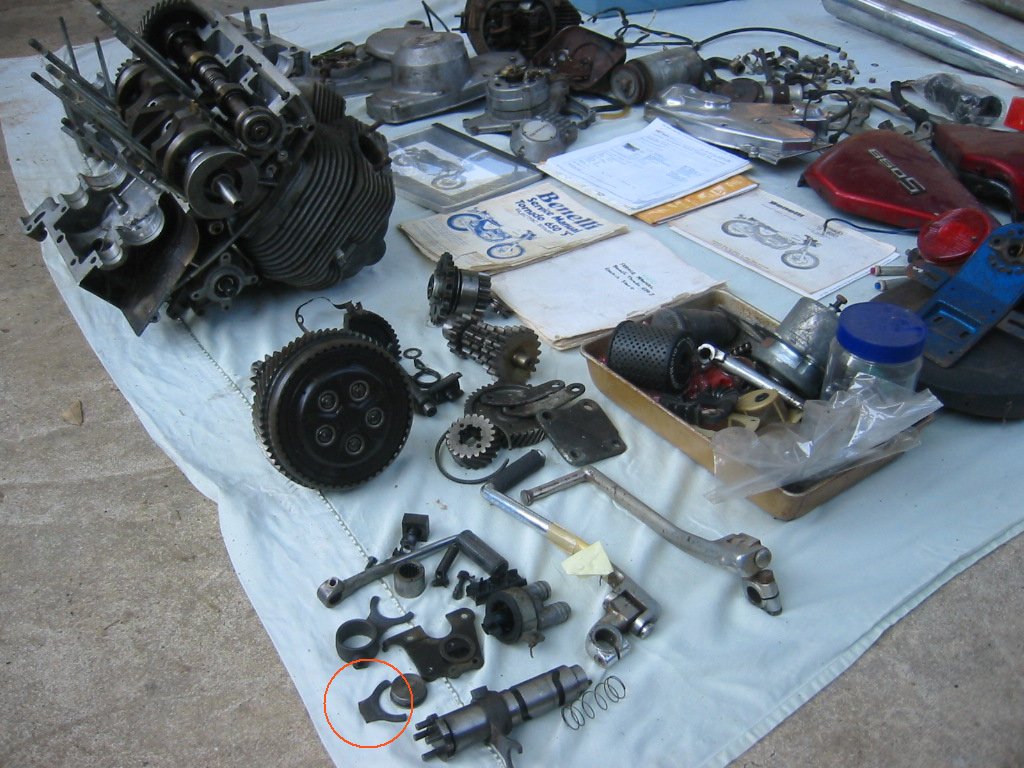
The disassembled motor. Circle shows the broken shift fork.
eBay produced a shop manual, a box of miscellaneous parts and a parts bike from Tennessee. The parts bike was a rough rolling chassis with a good bottom end of a motor. It was an earlier model but the parts catalog indicated that the transmissions were identical. The motors, otherwise, were quite different. The parts bike was kick start while the 72 was electric start. The latter had a modern Bosch alternator while the parts bike had a Magneti Marelli generator. As far as we could tell, however, the 72 motor was pristine apart from the shift fork so there were more than enough parts to put the 72 motor back together.
The one and a half bikes occupied a prominent section of Steve’s shop while he contemplated the the job of retrieving the shift fork and assembling the 72. But there always seemed to be something more interesting to do and the days turned into months and the months into years. Finally, Steve got tired of tripping over the pile of parts and decided they needed to go somewhere less obtrusive like the attic. Steve’s shop is a metal Quonset hut. It has an office and a bathroom walled off on one side and there is storage space on top of those rooms, an attic if you will. The bikes were further disassembled (wheels, fenders, and forks removed) and everything went up in the attic and there like a fine wine they aged for another 7 or so years.
I knew the bikes were up there but never thought much about them. Steve had several bikes come and go since then, a 250cc Kawasaki Samuri, a couple of Pre-unit Triumphs, a BMW R27 (that I sold him) and most recently a Hyosung gt250. Last Fall I was reading a classic bike magazine that had an article about Retro Tours in Pennsylvania. They take people on group motorcycle tours through the Pennsylvania countryside on their vintage motorcycles. Prominent among their stable was a Benelli Tornado. They said good things about the Tornado and that got me thinking that I should ask Steve if he wanted to sell it. He did and said $800 would take the whole kitten-kaboodle. I had just sold a bike so I had room in the shop and cash in the bank so I took him up on the deal.
Getting the parts out of the attic was a hoot for a couple of senior citizens. Fortunately, Steve had a block and tackle attached to the ceiling close to the perch where the parts were so the heavy parts (which was most of them) came down one by one with the block and tackle. After several hours it was all in the bed of my pickup and headed for home.
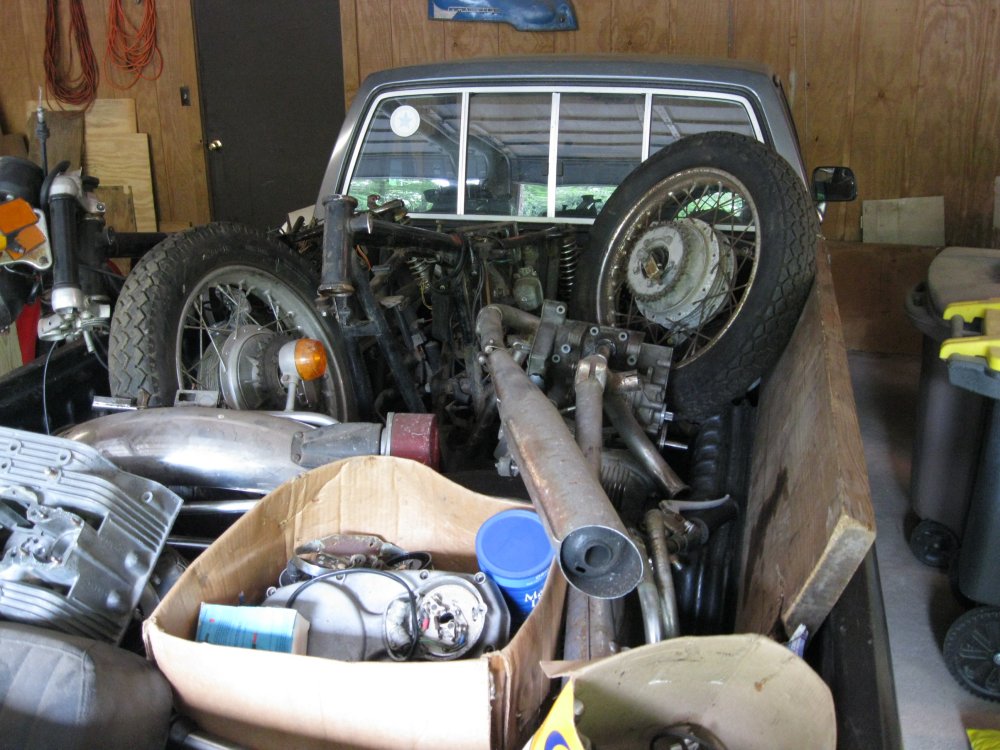
The Benelli parts arrive at my garage.
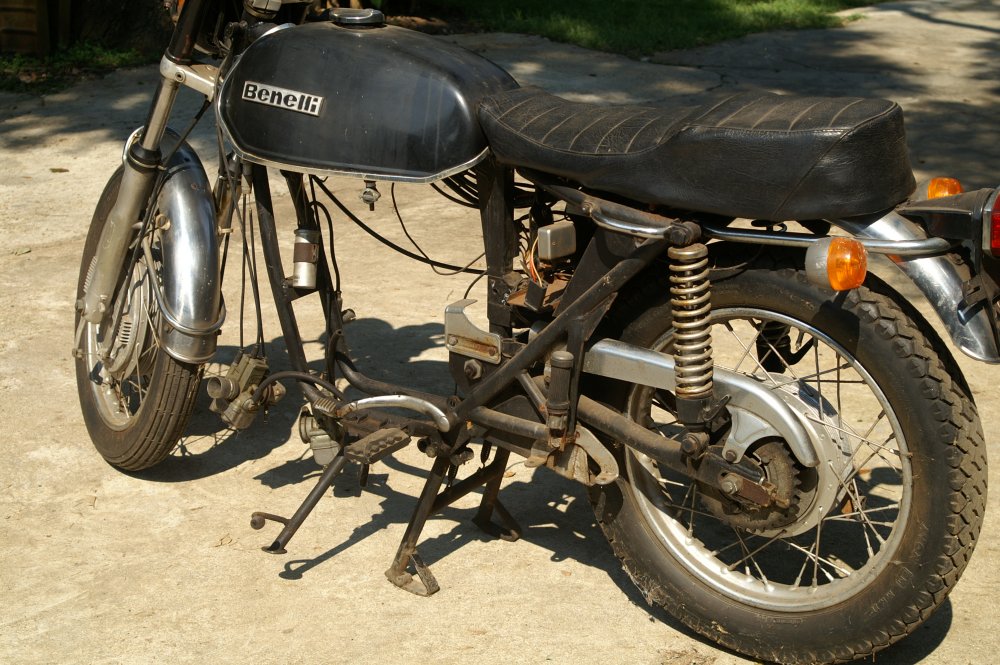
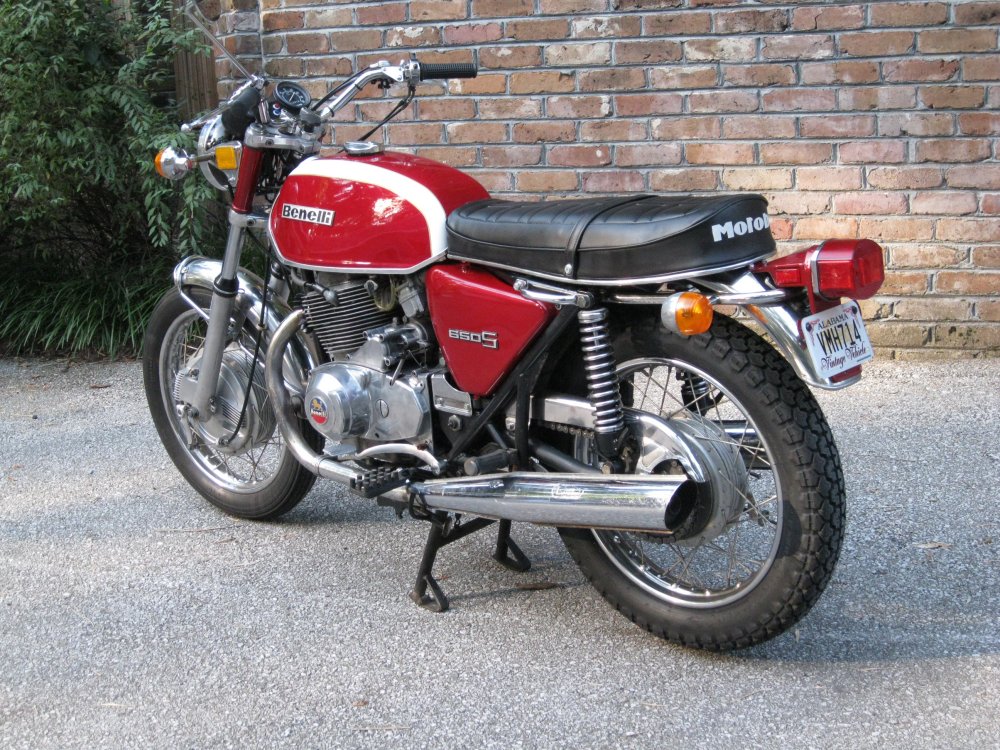
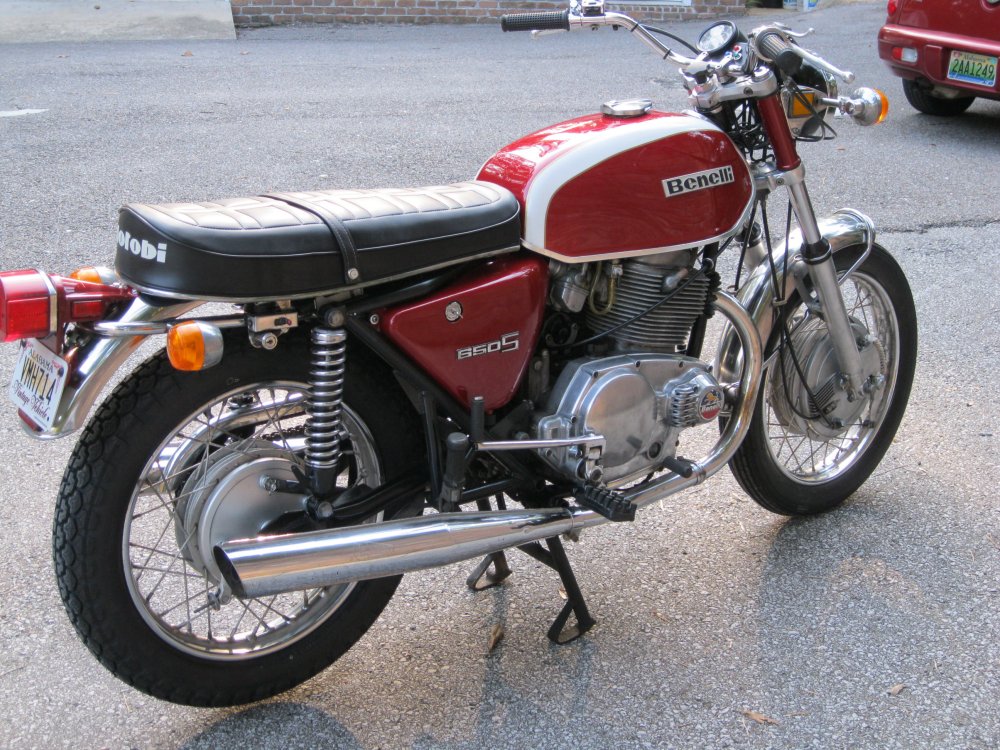
Benelli was a major motorcycle manufacturer in Italy starting in 1911. Like many motorcycle companies they were also a gun company (think Enfield or Birmingham Small Arms (BSA)). That probably had more to do with metal working skills than exercising their second amendment rights. Although their motorcycle business closed in the 80's, Benelli still makes fine shotguns. Most Americans knew Benelli cycles as the Riverside lightweights sold by Montgomery Wards during the 1960s. Cosmopoliton motors imported the larger Benelli bikes but never established an adequate dealer network in the US so relatively few were actually sold. Those that were sold suffered from inadequate dealer support and at the first serious mechanical problem were usually retired from service as was the case with my bike. In Europe sales were much better and Benelli competed directly with Moto Guzzi for the Italian heavyweight market. When the Japanese came on strong in the 1970's Benelli met them head on. First they produced the up-to date Tornado 650 twin featured here. The next was the Benelli Quatro, an in-line 4 cylinder 500cc bike with styling similar to the Honda CB750. But the cream de la cream was the Benelli Sei 900, a 900cc in-line 6 cylinder model. While the technology and styling were there the price was not, and sales dwindled. Motorcycle production was finally stopped in 1988. A new company bought the Benelli name and since 2002 has been making modern sport bikes under the Benelli name. In a futile attempt to bolster sales in the 1970s a second Italian company, Motobi, sold both the Tornado and the Sei under their name for several years. Notice that the NOS seat on my bike was actually made by Benelli for the Motobi variant and hence the Motobi logo across the back.
My plan was to get the Benelli running and see what I had and then determine how extensive a restoration it deserved. Having watched the pieces exit the Quonset hut had rekindled Steve’s interest in the Benelli and he offered to help me with the reassembly. In a couple of afternoons we had assembled a rolling chassis from the parts. Then we started on the motor. The crankshaft is a massive built-up affair with four ball bearings, two of which are double row (see the picture below). There are roller bearings on both the big and small ends of the connecting rods. The transmission is in ball bearings for the mainshaft and needles for the layshaft. The designer was very concerned that none of these bearings spin in their races so there is a half-moon key for each of them that must be perfectly positioned as the two case halves come together. This occurs in a blind fashion and if not perfectly aligned the cases will not seal. Jim Arrington helped us with this feat and finally after the 4th try we got a seal! Actually the third try was successful only to find that I had missed a crucial bolt that had to be inserted from the inside of the crankcase. We had an official Benelli shop manual but it was minimal at best making the project more like a jig saw puzzle. The case halves were sealed with a thin coat of Hondabond gasket sealer. The cylinder base gaskets were reusable soft aluminum and the head goes on with just an O ring. The only gaskets needed were for the right case cover and the starter chain cover which were cut from gasket paper. I reused the special thick Oil filter holder gasket with the aid of a little Hondabond. The valve covers again use O rings. Once the crankcase was buttoned up the rest of the motor went together quickly and soon it was residing in the frame. As of this writing it has been oil tight
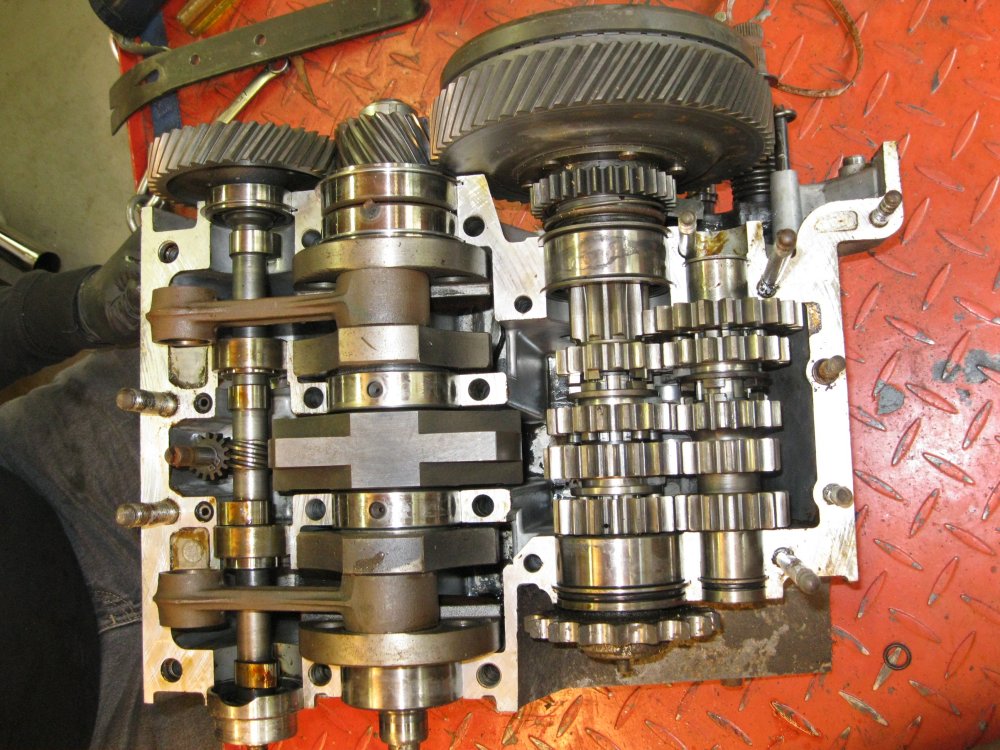
A peek inside a Benelli motor reveals copious use of ball and roller bearings throughout. Note helical-geared primary drive and the oil pump driving off the camshaft.
All of the cables were in excellent condition and all of the electrical wires seemed to be present in the right location so it was easy to wire up the alternator and lights. The first challenge was to time the ignition. I put a degree wheel on the end of the alternator and with Steve’s help tried to find TDC (top dead center). The motor has a sprag clutch on the starter. With the spark plugs out we could turn the motor forward with the crank shaft nut on the alternator but it did not like going backwards as the drag from the geared starter motor would resist turning and loosen the nut. Furthermore, the valve springs would cause the motor to coast past TDC in the forward direction. After about an hour we gave up.
I emailed the Joel Samick at Retro Tours and asked how they timed their Benelli. They said they used a PSD (positive stop device). You can actually make one by breaking the porcelain out of a spark plug and threading the inside with a tap. Then get a long bolt and put it through the plug’s shell with a lock nut to hold it in place with about an inch of the bolt protruding beyond the tip of the spark plug. Take the spark plugs out and put the PSD in one of the holes. Take the alternator housing off and put a degree wheel on the end of the crankshaft. Bend some coat hanger wire to make a pointer. Put the bike in high gear and gently bump the wheel forward until the motor stops turning as it hits the PSD. Note the position of the degree wheel. Now bump it backward. The starter will grumble but it will turn. Again, the motor will stop as the piston again hits the PSD. Note this position on the degree wheel. TDC is exactly half way between the two stop points. Turn the degree wheel so TDC will be at zero degrees and you are done. Remove the PSD and time the two sets of points either statically or with a timing light if it can be started. Both pistons move together so set both points at 4 deg before TDC full retard. Be sure the centrifugal advance is free and working. Using a test tank the motor stared right up and seemed to run well.
The next step was finishing the assembly. The tank was clean inside but one of the petcocks leaked. Not surprisingly, the round rubber gasket in the petcock was dried out and hard. I was able to make a replacement out of some 3/16" thick rubberized cork gasket material I get at O’ Reilly's auto parts store. It worked fine but there was a question as to which way the retaining plate went. The positions (RES and OFF) were printed vertically at either end so that was no help. To make a long story short I put the plate on upside down. "Reserve" was off and "off" was reserve. The tap on the other side was a different style and worked fine. Each tap feeds one carb. I put the tank on and put a half gallon of petrol in it and started it up. The first run down the drive was a disaster when I found that first gear on a Benelli us up rather than down and I was trying to take off in 5th. Once I found where first gear was, I turned the taps back on and off I went. It ran great for about a block and then I lost the left cylinder. I replaced the coil. I replaced the condenser. I was at a loss as to why when it was cold it would run so well and then crap out as it warmed up. To my chagrin I finally tested fuel flow. That’s when I discovered the upside down petcock plate. The carburetor bowl would fill up when I thought I was turning off the fuel and then run dry when I took it for a ride. Turning the plate right side up fixed this problem and after that it ran well.
It's alive!
Now I had a complete running bike. As you can see by the picture it still left a lot to be desired. Even in its short lifetime it had acquired a spray can black paint job and somewhere along the line someone had painted most of the chrome with silver paint to cover some thin surface rust. The CEV starter button had been replaced with an after-market car horn button. The seat was shot. The pan was badly rusted and a custom cover was fitted over a very dead foam pad.
I started with paint since there were only 3 pieces to paint. The side covers showed red on the inside so I decided to go back to the stock metallic red and white paint job. Pat Redding applied the base coat - clear coat paint on the tank and side covers. I masked off the trim on the tank and the pin striping is gold tape. The silver paint covering the chrome came off with lacquer thinner and brass wool. The pipes looked pretty good (not perfect) as did the rims. I polished the engine covers and the stainless steel fenders on the buffing wheel. While I had the fenders off and the front end apart I painted the headlight ears and the tail light red. Finally, I put a new set of Emgo European style bars on it.
The clutch and front brake lever perches do not have any provision for mounting a mirror so a clamp-on is the only choice. In recent years I have had a terrible time getting them to tighten down. The problem is that most of them are threaded the whole length of the mounting bolt. The design is for the mirror' stem to be held by the collar as the nut is tightened. Unfortunately, the threads usually bind on the strap rather than push the collar into the mirror's stem when you try to tighten it down. There is an easy solution. With a lathe (best choice) or a grinder (third choice) remove a ¼” of threads at the collar-end of the bolt as shown in the picture. Now it will tighten down smoothly and give you a solid mount.
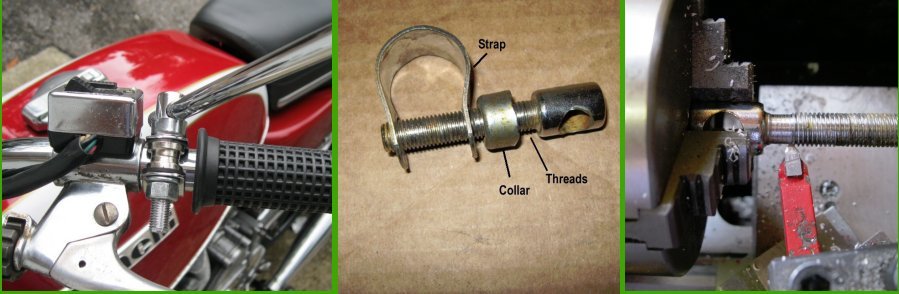
How to keep a clamp-on mirror from binding on it's threads.
Here is the part you have been waiting for: where do you find parts for a Benelli? I found two dealers in Germany http://www.Benelliparts.de and http://www.benelli-bauer-shop.de. Both have a limited supply of parts but between them you probably can get what you need. Both speak English, have an online parts catalogs that can be printed, and answer their emails. I was able to get footpeg rubbers, a tank hold down, an oil filter, a base for the multi switch on the handlebars, and grips all at reasonable prices. I solved the seat problem when I found a NOS Motobi seat at benelliparts.de. The price was cheap enough, 180 euro, but shipping was another 80 euro. Both dealers take PayPal so payment is simple. Moto Guzzi and Benelli share many parts so a Guzzi dealer like MG Cycle (http://www.mgcycle.com) is a good place to look. They have a complete selection of Dellorto carburetor parts as well as CEV electrical items and petcocks listed on-line. I was able to get float bowl gaskets and starter valve plungers from MG Cycle at a very good price. The T3 Moto Guzzi used the same Bosch alternator as the Benelli as did BMWs during the late 1970's. Finally, don’t overlook eBay. I found a complete seal kit for the motor on eBay.
The right side reveals the electric starter above the alternator case. Look at the hedgehog style footpegs.
Notice the horizontal kick start lever. The front brake has shoes on both sides of the Hub.
Ok so how does it run? The motor is way over-square (84mm x 58mm) so it revs quickly. Still, being pushrod, the motor redlines at 7,100 RPM. It is rated at 52 hp at 7,000 rpm. It’s a 360 degree twin so the pistons rise and fall together and that spells vibration. To quell the vibes Benelli mounted everything in rubber. They made copious use of 1” diameter rubber pucks with 6mm studs on either end. The headlight, the coils, the mufflers, the battery box, all were mounted with these bouncy rubber dampeners. I bought a couple dozen from McMaster Carr and replaced all of them. Note the hedgehog rubber pegs on the footpegs. That is vibration damping at the extreme but they do work. The handlebars are also in rubber. In the end the rider does not feel that the motor is constantly making like a Home Depot paint mixer between his legs. The exhaust has a nice bark and the motor is surprisingly torquey. If you shift quickly through the gears at about 3,000 rpm its torque will effortlessly push you through traffic. At 70 mph it just hums along. The handling is first class. The over-engineered frame makes the bike go right where you point it and the humongous 4-shoe front brake has lots of stopping power with no sign of fading. My only complaint is that the suspension is a little harsh. My 66 Triumph Bonneville is lighter and has a softer ride.
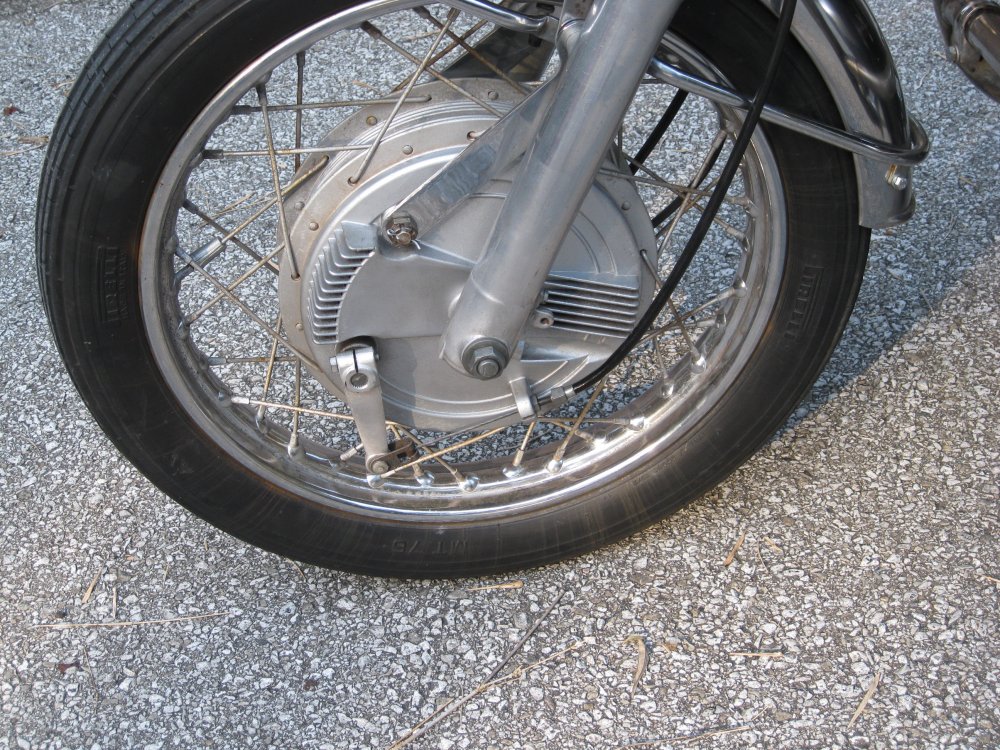
The big brake boasts two shoes on each side but only two of them are leading shoes. It will definitely stop the bike and looks great.
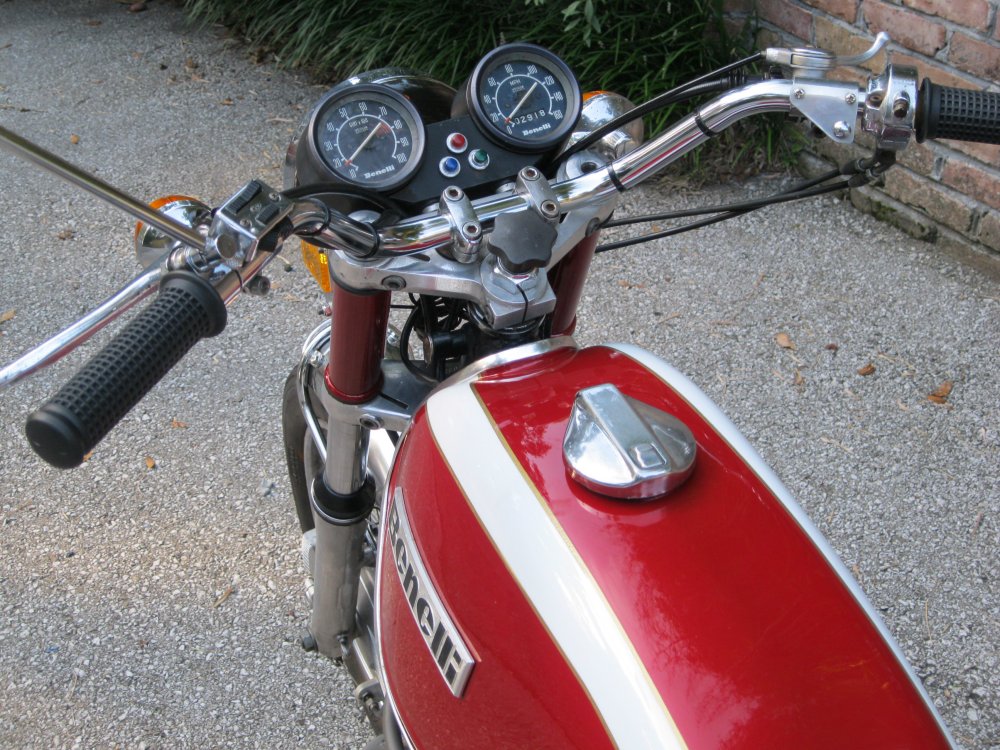
A rider's eye view. Nice instruments. The silver button on the right bar is the starter.
One of the quirks of the Benelli is that there is no air filter on the twin carbs. Tornados left the factory filterless. That is not as strange as it sounds. During the 1960s many domestic-market European motorcycles like the Triumph 650s were not fitted with a filter. Obviously care should be taken to avoid dirt roads and other dusty environments. Someday I may try to rig up some filters as there is tons of room under the side panels for them. Another quirk is there is no provision for a tool kit. I could have put one behind the side panels but they require a wrench to remove. I guess Benelli’s never break.